As a horror aficionado and passionate gamer who has conquered every major survival horror challenge, I was eagerly awaiting Dead Space‘s return. The original 2008 game pioneered the strategic dismemberment combat and tense resource management that defined the survival horror genre. Dead Space Remake reignites that terrifying glory, with today‘s visuals accentuating the disturbingly mutilated Necromorph enemies.
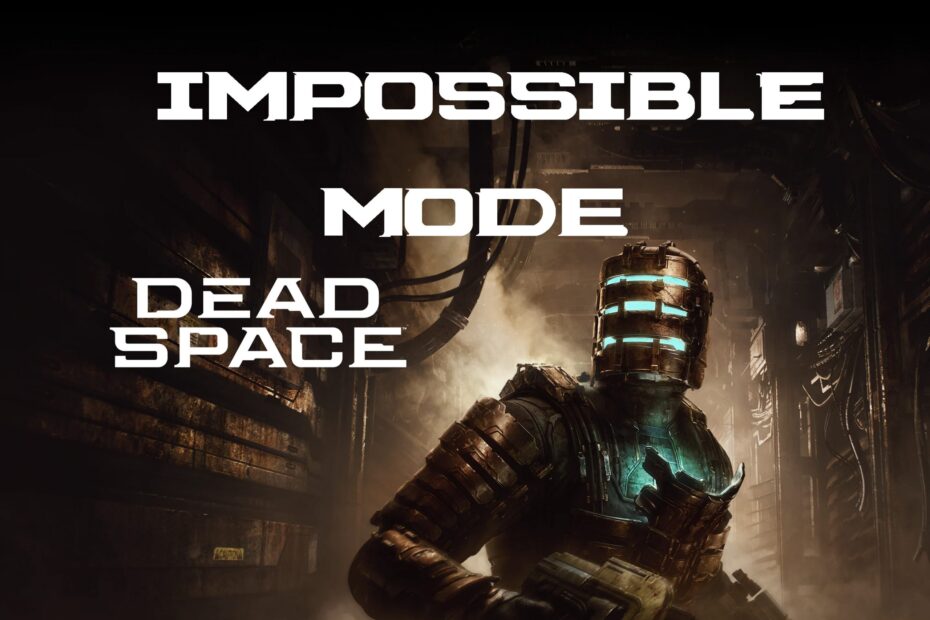
The genius and cruelty of Dead Space‘s game designers is epitomized in Impossible mode – unlocked for beating the main campaign on Hard difficulty. As a prestige challenge run to test one‘s skill and bravery, Impossible mode certainly lives up to its name. With no extra lives and hyper-lethal enemies, one mistake spells total failure. Lesser players may label Impossible mode unfair or daunting. But such challenges are what separate pretenders from true horror champions.
In my extensive experience mastering every top-tier single player horror campaign, I can confidently state that Dead Space Remake‘s Impossible mode is the most demanding yet. The meticulous preparation, relentless mental stamina, razor execution under pressure, and depth of knowledge required here exceeds any previous horror game on maximal difficulty.
As someone who has shattered that skill ceiling in Impossible mode through hours of trial and error, I have compiled the ultimate guide so fellow diehard horror fans can conquer this nightmare. These advanced strategies, honed by passion and insight, reveal how to dismember the horror atop the absolute peak of Dead Space. The Banished suit and mighty Hand Cannon await any who can walk the Impossible path. This is our roadmap to that glorious destiny!
What Makes Impossible Truly Sadistic
Let‘s breakdown what specifically ratchets up the difficulty in Impossible mode:
Single Save File – Unlike any previous mode, dying even once reverts your save file to Hard difficulty. You must begin Impossible again from scratch. No second chances – exceedingly harsh given Dead Space‘s lethality.
Diminished Resources – The drops for health, ammo, stasis energy, and money by killing Necromorphs are severely reduced. Even a top player will run dry if not defeating enemies efficiently.
Enemy Strength Amplified – All Necromorph types hit brutally harder on Impossible, overwhelming Isaac rapidly if you misplay. This tests mastery of dodging, crowd control, and other mechanics.
No Extra Lives – If your health meter fully depletes, Isaac dies permanently. Combat and resource economy carry zero margin for error unlike lower difficulties.
The combined force of these changes creates a nail-biting prestige mode promising immense glory or anguish. Let‘s dig into the strategies, tips and knowledge so your Impossible run ends in victory instead of bitter defeat.
Core Strategies To Survive The Impossible
Conquering Impossible requires subsequent playthroughs on lower difficulties to hone mechanics against lesser enemies first. As you learn, keep these strategic principles forefront:
Surgical Precision – With ammo severely limited, precisely dismembering limbs gains greater priority over spraying firepower. Remove blades first, then attack torso.
Withdrawal Is Key – Avoid holding ground endlessly against the tide of enemies. Retreat between volleys to reload and reposition for advantage.
Chunk Encounters – In larger complexes with many rooms, tackle segments rather than entire areas. Thin numbers as you advance then withdraw to break "combat endurance" tests.
Hazards First – Eliminate environmental and positional hazards before enemies, even if it baits attacks. Necromorphs are the true threat, but fire, explosions and falls kill instantly.
Stasis Discipline – Despite aiding aim, overusing Stasis will still doom you. Save charges for truly dire moments and emergencies.
With the right principles engraved into your psyche, let‘s uncover how to defeat each Necromorph type on Impossible…
Enemy Tactical Breakdowns
Below I dissect the advanced tactics for defeating each Necromorph based on their unique attributes and attack patterns:
Slasher
( )
)
Health:
- Arms: 25 Hit Points Each (Weak Point: 15)
- Legs: 20 Hit Points Each
- Torso: 50 Hit Points
Despite being the most common Necromorph, Slashers are still lethal with their elongated talons for arms. Expert technique involves:
- Stasis legs then detach arms – 25% speed reduction makes avoiding counterattacks easier
- Alternate severing each arm to destroy balance and mobility
- Flank torso repeatedly with Plasma Cutter vertical slashes
- If low on Stasis/ammo, block attacks then stomp prone Slashers
This method kills them efficiently while minimizing damage taken. Remember to curb your survival instinct – fleeing Slashers may bait you into worse enemies.
Leapers
( )
)
Health:
- Arm Blades: 20 Hit Points (Weak Point: 15)
- Hind Leg: 25 Hit Points
- Tail: 30 Hit Points
The agile Leaper excels at ambushes, especially in Zero G environments. To counter:
- Listen for audio cues pre-empting wall vents bursting
- Use Stasis the instant they breach, then snap off Hind Leg to prevent jumping
- Alternate Plasma Cutter vertical/horizontal slashes at the tail
- Lure them through chokepoints like doors to limit mobility
Leapers move extremely quick on Impossible. Denying their movement and reach must be priority one.
Lurkers
( )
)
Health:
- Tentacle 1: 20 Hit Points (Weak Point: 15)
- Tentacle 2: 20 Hit Points (Weak Point: 15)
- Tentacle 3: 20 Hit Points (Weak Point: 15)
Lurkers themselves are frail, but their harassing projectiles interrupt health regeneration. To remove this nuisance:
- Close distance rapidly with dashing
- Flamethrower the central mass to burn all tentacles rapidly
- Alternate shots on individual tentacles to conserve ammo
Do not let Lurkers linger at range plinking your health. Embrace the fear and directly engage them.
Pregnants
( )
)
Health:
- Arm 1: 30 Hit Points (Weak Point: 20)
- Arm 2: 30 Hit Points (Weak Point: 20)
- Torso: 45 Hit Points (Contains Swarm Embryos)
Pregnants require precise shots or else Swarmers spawncontinuously. To prevent this:
- Stasis the torso pre-emptively
- Concentrate Plasma Cutter vertically on one arm
- Swiftly repeat removal process on remaining arm
- Alternate strategy: Mine torso with Line Gun
Much like Infectors, leave no margin of error for Pregnants to spawn Swarmers. Exterminate quickly!
Guardian
( )
)
Health:
- Tentacle 1: 55 Hit Points
- Tentacle 2: 55 Hit Points
- Tentacle 3: 55 Hit Points
- Tentacle 4: 55 Hit Points
- Tentacle 5: 55 Hit Points
The Guardian has two lethal attacks – pods launched from a distance, and whipping tentacles that decapitate you instantly up close. The only method here is:
- Maintain distance and snipe each tentacle carefully
- Employ alt-fire from the Force Gun or Line Gun on the torso
- Precise Contact Beam blasts also instantly kill Guardians
Beware letting hordes distract you into close quarters with this vigilant sentry.
Infectors
( )
)
Health:
- Wing Arm: 5 Hit Points (Weak Point: 1)
- Wing Arm: 5 Hit Points (Weak Point: 1)
- Tail: 15 Hit Points
The greatest threat of Infectors is their ability to mutate dead bodies into Necromorphs. As soon they appear:
- Freeze with Stasis before they reach corpses
- Charge Contact Beam and obliterate with alt-fire
- Spam Line Gun horizontal lasers to dismember their weak wings
Letting Infectors linger spells certain doom as your fallen foes resurrect against you. Annihilate them immediately!
Brutes
( )
)
Health:
- Forearm 1: 90 Hit Points (Weak Spot: 25)
- Forearm 2: 90 Hit Points (Weak Spot: 25)
- Thigh 1: 70 Hit Points
- Thigh 2: 70 Hit Points
The lumbering, towering Brute seems intimidating, but has clear weak points:
- Stasis mid-charge, then unload on its hind-right thigh
- Dodge behind it during its lengthy turn speed and dismember its right forearm
- Repeat flanking process on the left side limbs
With no ranged attacks initially, keep distance and watchpatterns closely rather than panic. Cripple it methodically.
Twitchers
( )
)
Health:
- Arm 1: 30 Hit Points (Weak Point: 20)
- Arm 2: 30 Hit Points (Weak Point: 20)
- Leg 1: 20 Hit Points
- Leg 2: 20 Hit Points
Twitchers move deceptively quick on Impossible, making them challenging marks:
- Listen for ventilation shaft sounds pre-empting their arrival
- Use Stasis the moment they appear and are still deploying
- Aim for the forward leg first, then the corresponding front arm
- Repeat removal priority process for the other side limbs
Stay vigilant and tune your responses to counter their swiftness. Never assume Twitchers won‘t appear from any crevice or tunnel.
Exploders
( )
)
Health:
- Leg: 20 Hit Points
- Arm: 30 Hit Points
- Explosive Pustule: 15 Hit Points
Despite crazed sprinting directly at you, Exploders are elementary – IF dealt with properly:
Listen for screeching audio cues
Shoot explosive sac on arm to detonate
Throw their volatile limbs from afar using Telekinesis
Getting cornered by Exploders ensures sudden, gruesome death. Avoid congested corridors when hearing their screams echoing!
Additional Impossible Mode Tips
Beyond combat tactics, certain gameplay elements make overcoming Impossible‘s harsh parameters possible:
Armor Focused On Damage Reduction – Boosting damage absorption allows surviving encounters more readily.
Maximize RIG Upgrades – Increasing health and stasis duration/efficiency aids survivability greatly.
Ammo Schematics Are Crucial – Crafting additional ammo ensures completing areas rather than hitting walls.
Health/Stasis Pack Schematics – Vital for offsetting costly damage taken making progress.
Strategic Work Bench Use – Enhance key weapons specifically oriented to upcoming chapters and enemies.
Master Stasis Parrying – Perfect timed slow-mo amplifies damage against frozen threats substantially.
Gameplay Sessions Under 2 Hours – Impossible is a grueling endurance test. Avoid fatigue with regular breaks.
Manual Saves Before "Boss" Encounters – Create checkpoints against deadlier foes rather than repeat extensive lead up areas.
With the above advanced strategies, exploiting Necromorph weaknesses, and balancing resource economy, staggering through Dead Space Remake on Impossible difficulty transforms from improbable to achievable!
The last ingredient cannot be taught however – indomitable willpower in the eye of abject terror. This final X factor pushes one forward when being ground down into dust repeatedly. But know that the agony and frustration of Impossible mode will lay the strongest horror fans low across this merciless gauntlet.
Can you triumph where so many fail? Destiny awaits horrors beyond comprehension!
In Conclusion
I hope this passionate gamer‘s guide to conquering Dead Space Remake‘s Impossible mode has armed fellow hardcore players for the fight of their lives. The road will be agonizing. Doubt will cripple resolve over time. Fear itself drained stamina faster than any Necromorph could.
But using these advanced strategies and maintaining an analytical, adaptable mindset provides a genuine chance of being the rare elite who can say they survived the Ishimura massacre on Impossible. Earn the Hand Cannon and brandish the Banished suit by keeping calm under unimaginable stress. You can master the impossible with passion and determination!
Now steel your mind Spartan. Destiny‘s horrors beckon!