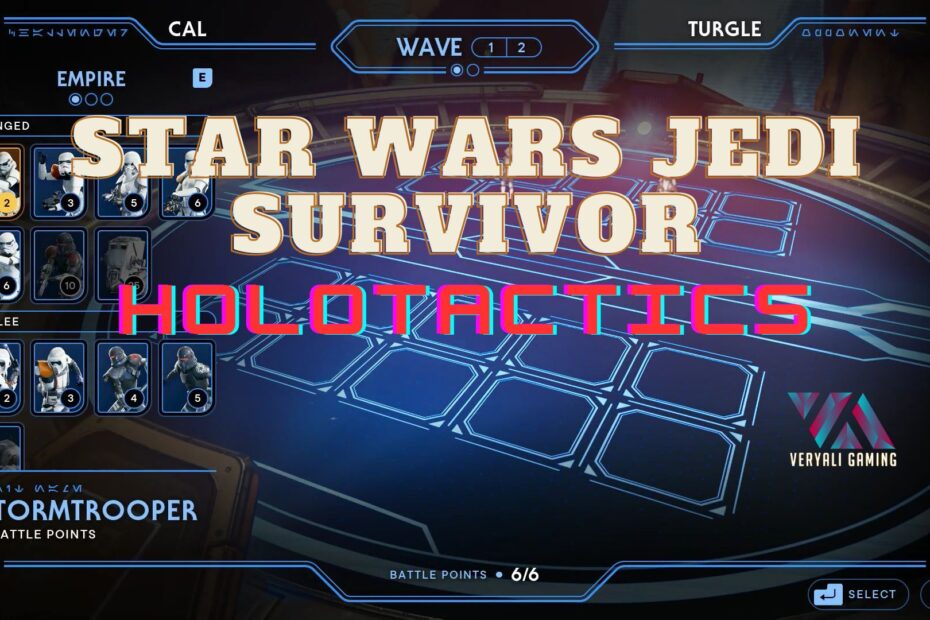
As an avid Star Wars fan, I was thrilled when I unlocked the Holotactics mini-game in Jedi: Survivor. This battle simulator lets you command armies of iconic Star Wars units against iconic monsters from the franchise. With strategic unit composition and cunning tactics, you can claim glorious victory!
In this comprehensive guide, I‘ll cover everything needed to master Holotactics, including:
- How to unlock the mini-game
- Faction and unit overview
- Gameplay flow and match basics
- Monster lineup and battle strategies
- Useful tips from my experience
So recruit your forces and prepare for battle on the Holotable!
Unlocking the Holotactics Mini-Game
The first step is accessing Holotactics by completing the "Odd Pair" rumor on Koboh Wilds:
- Reach Rambler‘s Refuge outpost in Koboh Wilds
- Head west to Boiling Bluff area
- Traverse cliffs to reach plateau using Nekko jumps
- Defeat Mogu monster guard
- Meet characters Tulli & Bhima near cliffside
- Recruit them at Pyloon‘s Saloon to unlock Holotactics!
I loved meeting Tulli and Bhima during this rumor. Their lighthearted banter and introduction to Holotactics made the payoff of unlocking the mini-game even more satisfying!
Factions and Units Overview
When gearing up for battle, you can recruit troops from three factions:
- Empire – Imperial army units like Stormtroopers
- Bedlam – Raiders, smugglers, and mercenaries
- Fauna – Creatures and wildlife from the planet
Units are further classified as Ranged or Melee, with costs based on power level. Here is a breakdown of key characteristics for each faction:
Empire Units
The backbone of the Imperial Military. Organized structure and advanced weaponry.
- Pros: Heavily armed and armored. Tactical formations
- Cons: Expensive troop costs. Vulnerable to chaotic attacks
Bedlam Units
Ragtag mercs and pirates. Unorthodox tactics and makeshift gear.
- Pros: Cheap, low cost units. Unexpected tactics
- Cons: Weaker armor. Tend to break formation
Fauna Units
Ferocious Koboh wildlife. Savage instinct and physical might.
- Pros: Raw Strength. Expendable meat shields
- Cons: Unpredictable. Weak to advanced weaponry
Understanding these faction traits allows you to craft synergistic squads combining their strengths!
Unit Spotlight: Droideka

Of all units, I love utilizing Destroyer Droids (Droidekas). These rolling assaults droids encapsulate the best of ranged power. Between their arm cannons and shield generators, they can unleash devastating barrages!
- Cost: 12 points
- Faction: Bedlam Raiders
- Type: Ranged
- Abilities:
- Twin blaster cannons
- Deflector shield
When protected by melee units, Droidekas can shred through waves while deflecting damage. They exemplify cunning Holotactics strategy!
Holotactics Gameplay Flow
Now that you understand recruitment options, let‘s break down the flow of a standard Holotactics match:
- Select enemy: Choose opponent monster to face
- Enemy intro: Introduction and scouting report
- Wave prep: Allocated points to spend on recruiting units
- Troop training: Buy units and position them on the Holotable battlefield
- Combat: Watch battle unfold and gameplay automated
- Repeat: Additional waves face enemy until victory/defeat!
Adapting your strategy between waves based on enemy composition is key. I love how the battle system autocalculates strengths and weaknesses of different squads once committed to the field. This allows focusing on higher level recruitment tactics each round rather than micromanaging each trooper in real-time.
The dynamic escalation of facing deadlier enemies with more resources at stake makes progression intensely fun!
Holotactics Monster Roster
Now let‘s overview the roster of intimidating monsters awaiting duelists on the Holotable:
| Monster Name | Description | Number of Waves |
|---|---|---|
| Turgle | Hulking brute | 2 |
| Greez | Expert gunslinger | 3 |
| Tulakt | Mercenary commander | 3 |
| Merrin | Nightsister magician | 3 |
| Caij | Demolition expert | 3 |
| Skoova | Cold tactical officer | 4 |
| T-1N8 | Enormous combat android | 4 |
| Tulli | Holotactics inventor himself! | 4 |
As you progress from early opponents like Turgle onto challenges like Tulli, mastery over squad composition and tactics is required. Let‘s breakdown approaches to defeating each monster:
Dominating Turgle
This lumbering beast depends on brute force. While intimidating initially, his lack of sophistication when destroying troops makes him predictable.
The key is maximizing damage output:
- First Wave: Raid Grunts to bait out attacks
- Second Wave: Droideka squad for ranged demolition
Winning earns a Priorite Shard – useful for lightsaber crafting!
Outgunning Greez
Few can match Greez‘s marksmanship, but deploying distraction units allows concentrating firepower:
- First Wave: Cheap droids to divert attention
- Second Wave: Pierce defenses with Droidekas
- Third Wave: Overwhelm with depth of reinforcements
His stylish Pilot Jacket makes facing this gunslinger‘s wrath worthwhile!
Tactical Take Down of Tulakt
Mercenary commander Tulakt utilizes well-drilled infantry and support weapons. Match organization with superior technology:
- First Wave: Establish firing lanes for Baleswords
- Second Wave: Flank armor with commando droids
- Third Wave: Pincer maneuver using Imperial walkers
Managing Tulakt‘s deadly armored divisions requires masterful positioning – but claiming his shiny metal coating materials makes it so satisfying!
Merrin‘s Magic Unraveled
Facing off against this Nightsister‘s vile sorcery means leaning on the Empire‘s regimented resolve:
- First Wave: Stubborn Sentry Droids endure early losses
- Second Wave: Advance shielded Heavy Troopers
- Third Wave: Overwhelm with combined arms barrage
While devastating initial summoned horrors, her limited stamina for magic ultimately fails against concentrated assaults. Now to decrypt secrets from her Ancient Jedi Holocron prize!
Blasting Through Caij
Booby traps and explosives fill this demolition expert‘s playbook. But applying explosive ordnance of my own lets me retaliate in kind!
Key tactics include:
- First Wave: Clear minefields with Probe Droids
- Second Wave: Berkeley Artillery pacifies dug-in positions
- Third Wave: Acklay monsters rout final defenses
His unique Bounty Puck for bringing lawless scum to justice will fund many additional armies!
Skoova Squadron‘s Downfall
Imperial officer Skoova‘s mastery of heavy walkers requires heavyweight measures:
- First Wave: Ion Grenadiers disable mechanical threats
- Second Wave: Air support pummels armor into submission
- Third Wave: Jet Trooper blitzkrieg overruns skirmishers
- Fourth Wave: Flame assault walkers torch remaining holdouts
Toppling her steel legions makes claiming Skoova‘s stylish Mustache accessory worth the tribulations!
T-1N8 Titan Toppled
This colossal android‘s overwhelming firepower demands enduring losses until exposing weak points:
- First Wave: Gorgers stampede absorbing damage
- Second Wave: Thermal detonators stun stabilizers
- Third Wave: Ion missiles disrupt systems
- Fourth Wave: Sabotage droids commandeer weapons
While taxing, destroying this titanium titan secures his Decryption Drive – opening opportunities with restricted data terminals!
Conquering Creator Tulli
Finally, facing fabulous Holotactics inventor Tulli himself in the ultimate challenge! His creative skills make every battle a fresh test:
- First Wave: Droideka blitz inflicts quick losses
- Second Wave: Air raids bypass frontline distractions
- Third Wave: Flamethrowers incinerate headquarters
- Fourth Wave Checkmate: Dwarf Spider Droids execute encirclement
After desperately defending early waves, surrounding command with overwhelming machines ultimately collapses his grand army! The prized Skill Point from Tulli‘s Workshop makes mastering his magnificent creation worthwhile!
Holotactics Pro Tips from My Experience
Having battled all challengers, here are some expert tips:

- Assign hero characters like Cal as commanders for additional bonuses
- High ground terrain boosts ranged damage – exploit with walkers or aerial vehicles
- Funnel enemies into kill zones between durable shield walls
- Conserve early resources for critical late expenditures
- Avoid overconfidence! Even simple Turgle can overwhelm the unprepared
Implementing these hard-earned lessons paves the path to total Holotactics supremacy!
Holotactics Mastery Achieved
The depth of strategy and thrill of claiming glorious victory against iconic Star Wars adversaries makes Holotactics an absolute blast! I hope these insights into factions, units, monster strategies, and expert tips empower you to recruit ultimate armies for becoming a Holotactics Master.
Now get out there Commander – the Holotable awaits!