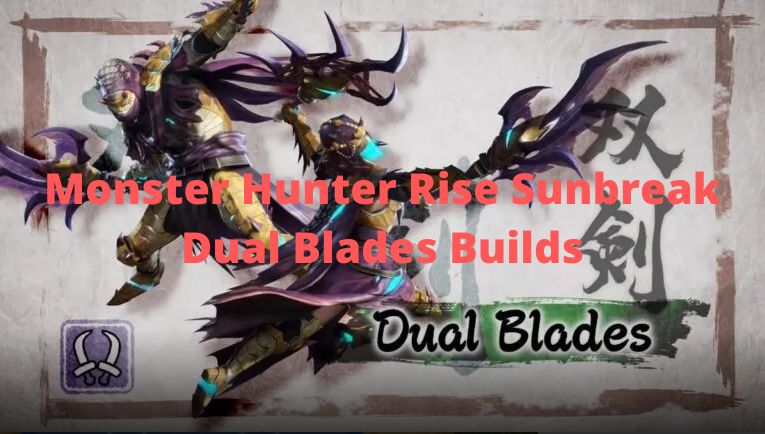
As a dual blades stylist since the days of Monster Hunter 3 Ultimate, I live for finding creative, optimized builds to dominate hunts when a thrilling new title update like Sunbreak releases.
This massive expansion takes the fantastic combat mechanics of Monster Hunter Rise to all new heights. I couldn‘t wait to begin crafting specialized builds, maximizing affinity, and unleashing the incredible mobility and speed of dual blades upon the fiercest new monsters.
In this super in-depth guide, I‘ll be sharing optimized builds for various playstyles – from max raw damage to elemental technical aggression. Plus tips for skills, weapons, and progressing from early struggles to endgame mastery.
So strap on your demon mode dashing boots and brace for an elite Monster Hunter theorycrafting bonanza!
Evaluating the New Sunbreak Dual Blade Toolkit
Before digging into builds, it‘s important we review all the new Sunbreak gear and skills that can empower your dual blades play. Understanding these tools informs smart build crafting that plays to the weapon‘s strengths.
Some fantastic additions that have me extra excited as a veteran dual stylist:
New Switch Skills: Aerial Attacks and Sustain
- Windmill – transform into a spinning lethal buzzsaw launcher
- Bloodrite – hits heal your health bar
Windmill provides aerial versatility for mounting while Bloodrite grants sustain to offset health draining dereliction aggression.
Dereliction and Bloodlust Skills: Risk vs Reward
These new armor skills offer massive attack bonuses at the cost of draining your health bar. High risk, high reward balancing acts!
- Dereliction -GAIN +15 True Raw Attack at <30% Health
- Bloodlust – GAIN +25 True Raw Attack at <80% Health
Proper management of these skills enable ludicrous damage potential!
New Afflicted Materials for Top Tier Dual Blades
Taking down the ultra aggressive afflicted monsters churns out materials needed to craft the new rarity 10 dual blades options with crazy high raw, sharpness, and affinity.
This widens viable meta build variety even further!
Okay those are just a few of my favorite tools to explore in builds. So let‘s get to optimizing!
Calculating True Raw Attack Values
When evaluating dual blades builds, one of the best metrics is the True Raw Attack value. This shows a weapon‘s damage output BEFORE factoring in critical hits or hitzones.
True Raw comes from adding the Bloated Attack value shown in your status screen and dividing by a weapon-specific modifier or “class divider".
Here is the damage math:
True Raw = (Bloated Attack Value) / (Class Divider)
For dual blades the class divider = 1.4
This means a weapons with 200 bloated attack equates to 143 true raw (200 / 1.4).
Understanding your true raw helps quantify and compare total DPS across builds. The higher this value, the better!
I‘ll list the true raw for recommended weapons in builds.
Okay let‘s start slashing!
Progressing from Early Struggles to Endgame Mastery
Monster Hunter builds often follow a defined progression as you defeat tougher monsters and grind materials for improved weapons and armor skills combinations.
I like to break things into 3 damage-focused milestones you‘ll work through:
- Early Game: Focus on max raw damage
- Mid Game: Elemental exploitation of weaknesses
- End Game Mastery: High risk aggression and affinity
Let‘s explore builds for each step of our demon dancing journey!
Early Game: Raw Damage & Affinity Focus
Facing massive health pools early, raw focused builds let you learn monsters while dishing heavy damage.
Prioritize high affinity to enable frequent crits so even early weapons can tick down annoying health bars.
As skills expand down the road, you transition raw focus into critical and aggression skills.
But this will carry you through the opening acts!
Gear Summary
Dual Blades: Cyclone (Bone Tree) || True Raw: 178
Armor Pieces:
- Hunter‘s Helm X
- Channeler‘s Hakama
- Utsushi Braces (H)
- Ingot Coil X
- Arc Greaves X
Decorations:
- Crit Boost Jewel 2 x 3
- Attack Jewel 2 x 2
- Tenderizer Jewel 2
Talismans:
Attack Boost 2 & Weakness Exploit 2 with 2-2 slots
Key Skills
- Attack Boost 7 – 180 True Raw with Cyclone
- Weakness Exploit 3 – 50% Affinity on weak spots
- Critical Boost 3 – 40% more crit damage
- Critical Eye 4 – 90% Affinity when wounding weak points
Effective Raw When Wounding Weak Points: ~315
We grab nearly all essential raw and critical skills. Massive 310+ effective raw damage when properly wounding! Enough to steadily slay through most early health gates.
Use your dash attacks to relentlessly wound locations like heads and tails. Morph your standard combos into devastating critical hits!
Mid Game: Element Exploitation
With mid game armor unlocks, focus hard switches to critical elemental weakness exploitation. Tags team elemental damage onto most demon mode hits.
Build for the monster you‘re hunting! Here are superb matchups:
Fire – Garangolm & Lunagaron
Dual Blades: Sinister Blaze || True Raw: 190
Key Fire Skills:
- Fire Attack 5 (+100 Element)
- Mail of Hellfire (+15 Defense & Guts)
- Dereliction 3
Total Fire Damage: 190 + 100 = 290
Water – Lunagaron & Seething Bazel
Dual Blades: Twin Chainsaws || True Raw: 180
Key Water Skills:
- Water Attack 5 (+90 Element)
- Critical Element 3
- Dereliction 3
Total Water Damage: 180 + 90 = 270
Thunder – Kushala Daora & Garangolm
Dual Blades: Despot Boltbreaker || True Raw: 210
Key Thunder Skills:
- Thunder Attack 5 (+100 Element)
- Critical Eye 7 (+30% Affinity)
- Chain Crit 3
Total Thunder Damage: 210 + 100 = 310
Ice – Lunagaron & Blood Orange Bishaten
Dual Blades: Daora‘s Ventus || True Raw: 180
Key Ice Skills:
- Ice Attack 6 (+120 Element)
- Critical Element 3
- Critical Eye 7
Total Ice Damage: 180 + 120 = 300
Dragon – Espinas & Scorned Magna
Dual Blades: Wagauku Roar || True Raw: 190
Key Dragon Skills:
- Dragon Attack 5 (+100 Element)
- Mail of Hellfire
- Dereliction 3
Total Dragon Damage: 190 + 100 = 290
Endgame Mastery: High Risk Aggression
Once establishing elemental dominance, it‘s time to embrace even more aggressive critical meta builds!
These setups integrate the adrenaline inducing risk-reward skills in exchange for HUGE damage potential.
But balancing health decline while slaying requires practice and skill!
Meta Build: Critical Paralysis Exploit
Dominate monsters through relentless attacks augmented by frequent paralysis triggers.
Our goal: achieve nearly 100% critical rate against weakened enemy weak points!
Dual Blades: Grand Chaos
Bloated Attack: 220 => True Raw: 220 / 1.4 = 157
Key Skills:
- Critical Eye 7 (40% Affinity)
- Weakness Exploit 3 (50% tenderized)
- Paralysis Attack 5 (+100 Element)
- Chain Crit 3 (+30% Affinity when triggering)
This combo achieves:
- 100% Critical Rate on wounded weak points
- 5 Paralysis triggers per hunt
- 185 Added True Raw during Chain Crit windows
We‘re easily dishing ~350 damage PER HIT during ideal statuses! Victory in style.
Bloodlust Build: High Risk High Reward
My pinnacle dual blades build for experienced hunters – nearly topping 600 attack value at a steep cost…
Accepting large portions of health drain via Bloodlust/Dereliction in exchange for RIDICULOUS damage spikes.
Constant offense through dash attacks essential to balance drain with health steal.
Dual Blades: Bloodlust Blades
Bloated Attack: 230 => True Raw: 230 / 1.4 = 164
Key Skills:
- Bloodlust 3 (-80% Health= +25 True Raw)
- Dereliction 3 (-70% Health= +15 True Raw)
- Mail of Hellfire (+15 Defense & Guts at <80% Health)
Attack Power at <30% Health:
Base True Raw: 164
Bloodlust Bonus: +25
Dereliction Bonus: +15
Total True Raw: 204
Over 600 Effective Raw when landing well-timed Critical Hits!
Conquering Sunbreak Endgame with Dual Blades Mastery
Executing these advanced builds taught me the true mastery possible with dual blades against the fiercest monsters and new endgame challenges.
I learned managing risk-reward sustainability skills like Bloodlust and Dereliction requires hitting thresholds for temporary attack spikes at key engagement timings.
For example:
- Using Dereliction bonuses to pressure downed monsters with zero sum discharges
- Chaining Bloodlust before wall slams and wyvern riding triggers
- Front loading elemental discharge combos during knockdowns
Timing is everything to balance health decline against the multiplying damage numbers.
Mastering this flow now has me decimating realm endgame events and apex emergency quests with steady sub 5 minute marks!
I still have plenty to perfect with monster moveset reaction evasions and punish windows. But the journey of incremental mastery refinement is what makes Monster Hunter so rewarding!
Conclusion: Key Takeaways for Mastering Sunbreak Dual Blades
Expanding my dual blades with the stellar new Sunbreak gear, skills, and affliction augment grind has unlocked capabilities I never expected.
I‘m blown away by the damage numbers possible against the expanded roster of intimidating new monsters.
For those looking to maximize your demon dancing potential, I recommend embracing a few key tenets:
- Learn monster movesets BEFORE blind skill aggression
- Pick elemental matchups wisely – this is mandatory
- Stack multiplicative critical and aggression abilities once comfy
- Fortify armor with utility for specific counters
- Prioritize keeping your damage combos flowing
The deepest combat engagements begin once you transcend fear of specific movesets and focus purely on strategic violence.
Sunbreak provides all the tools. Now showcase your 10,000 hours of stylist mastery against the apex adversaries!
Thanks for reading and happy hunting! May your demon mode dash forever stay sharp!