As a hardcore Diablo gamer with over 200 hours invested across the franchise, I was eagerly anticipating the challenging Iron Hold dungeon being added in Diablo 4. This sprawling multi-level prison is hailed as one of the most rewarding endgame dungeons, filled with waves of demons, mini-bosses, and the legendary Fastblood Aspect reward.
Through numerous attempts exploring the dark depths of this dungeon, I‘ve compiled all my hard-earned knowledge into this definitive walkthrough guide. Follow my insights and expert strategies to conquer the Iron Hold and its vile inhabitants!
Backstory of the Iron Hold
Before we delve into the dungeon itself, allow me to set the scene with some backstory. The Iron Hold originally served as an underground prison built beneath Castle Rakhat to house dangerous sorcerers and heretics. After years of confining vile magic and demonic entities, the latent evil energy gradually corrupted the bricks and mortar of the dungeon.
Now the Iron Hold acts as a nexus point, drawing sinister forces through rifts to occupy its haunted halls. Imps, fell beasts, and apparitions run amok in this sprawling multi-chambered complex. At its heart lurks Scourge, a powerful demonic jailer who feeds upon the trapped souls.
Our goal as valorous nephalem is to brave the challenges of the Iron Hold, slay Scourge, and claim the ultimate prize…the Fastblood Aspect which reduces ultimate cooldown for Necromancers. But it won‘t come easy!
Overview of Enemy Types
Before setting foot in the Iron Hold, it‘s wise to familiarize yourself with the many enemy types dwelling within:
- Vengeful Spirits – Quick phantom-like enemies that can phase through walls and fire shadow bolts from range
- Skeleton Corps Axes – Heavily armored reanimated skeletons that hit brutally hard in melee combat
- Infernal Sisters – Sorcerous fiery demons specializing in explosive AoE and burning damage over time attacks
- Demonic Hounds – Vicious hellhounds that hunt in packs and attempt to surround their prey
- Xanthus Revenants – Magic-wielding goatmen shamans who summon spirit allies and cast debilitating curses
Ideally you want to utilize a combination of single-target and AoE abilities tailored to handle each threat. Having some form of snare or immobilization helps considerably with controlling dangerous packs of fast enemies. Gearing defensively with high resistances should also enable you to withstand the onslaught of attacks from all sides.
Now let‘s delve into the step-by-step journey into the depths of this foreboding dungeon!
Finding the Dungeon Entrance
The first step is locating the eerie entrance to the Iron Hold amidst the Ruins of Rakhat, situated here on the map:

Approach with caution as the veil between realms is thin around the crumbling ruins. Interact with the skull-adorned doors to open a gateway into the suffocating darkness within.
You can feel the latent malice thick in the air as you descend into the maze-like Awoken Cells. This is where your trial begins…
Clearing the Awoken Cells
The Awoken Cells form the outer layer of chambers and corridors enclosing the deepest reaches of the Iron Hold.

Vengeful Spirits drift aimlessly through the halls, likely fallen prisoners from ages past. Their numbers are many, but individually pose little threat. Utilize AoE attacks to efficiently clear packs of skeletons and claw your way towards the Radioactive Shrine.
Activating this ancient shrine imbues your attacks with vile energy for a short duration. Enemies begin flooding the corridors – use this as an opportunity to rack up kills rapidly!
Battling the Skeletal Honor Guard
Past the shrine‘s influence lies the Burial Chambers where a grisly surprise awaits… An elite Skeletal Honor Guard armed with cruel barbed halberds and thick steel armor.
Flanked by Revenant allies, this vicious warrior wastes no time pressing the attack. Utilize mobility and snares to side-step deadly slashes and prevent becoming surrounded. Rotate defensive abilities to mitigate the Honor Guard‘s cleaving strikes while carefully navigating around the skeleton‘s whirling spins.
After a protracted bloody battle, the monster finally collapses into a pile of smoldering bones. Don‘t forget to loot the Gilded Chests hidden behind pulsing green spirit barriers – they contain rare crafting materials and gems!
Locating the Jailor‘s Keys
Having bested the dungeon‘s guardians, you gain access to the true depths. First priority is locating the Jailor‘s Keys necessary to unlock the enchanted seals gatekeeping Scourge‘s domain.
Traversing the Labyrinth of Whispering Skulls, put your AoE abilities to work against roaming packs of vile Demonic Hounds. Their soul-chilling howls echo through the corridors as you systematically exterminate the creatures.
Eventually you come across a unassuming side chamber with stairs leading downwards. This passage takes you to the Ossuary – an eerie catacomb littered with corpses…and the keys clutched in a long-dead prisoner‘s skeletal hand! Retrieve your prize, but be ready to battle vengeful spirits drawn by the magical aura.

Now begins the real trial – unlocking the ensorcelled barriers to Scourge‘s Sanctum with blood…
The Blood Seal Ritual
Many have attempted to breach the wards sealing the inner sanctum, but only a blood sacrifice can grant passage. Two enchanted Blood Runestones must be returned to their pedestal to weaken the veil…
Foul bat-like Thrakul swarm the abandoned mines, but pose little threat to a seasoned veteran. Clearing the critters allows you to focus on locating the glimmering crimson stone ensconced in a mining cart.
Likewise, the second stone sits amidst rubble behind a Destructible Wall. Use brute force or explosives to shatter the bricks blocking your prize. Locating these well-hidden artifacts relies upon keen observation!
At last, journey back to the initial chamber and insert both Blood Runestones into the altar. The ground rumbles as a glowing portal manifests…the way forwards is open!

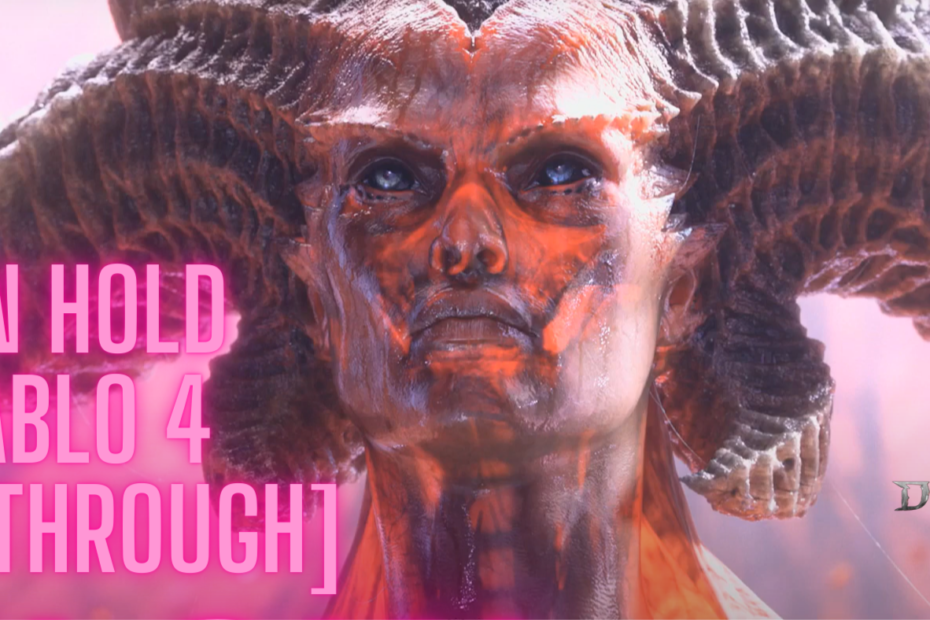
Overcoming Scourge, the Vile Jailer
Step through the portal to enter Scourge‘s throne room for the climatic showdown! This colossal horned demon guards the Fastblood relic, and has no intention of parting with it freely…
Right away Scourge unleashes pulsing waves of soul-draining energy capable of wiping out overconfident heroes. Keep mobile while unleashing attacks during his recovery windows. Around 75% health, Scourge‘s chains come crashing down – move immediately or suffer staggering blows!
Between slashing darkness waves and brutal channeled strikes, opportunities to counter-attack are fleeting. Utilize your most powerful single-target attacks while avoiding his small arena‘s deadly black patches.
Around 50% health, the environment becomes filled with lethal pulsing shadows. End the fight quickly before the darkness closes completely! Rotate defensive CDs to weather his relentless assault during these final moments.
With a pained howl, Scourge crashes lifeless to the fractured obsidian floor. Revel in hard-won victory as you claim the Fastblood Aspect bestowing lower Necromancer cooldowns. Additional epic gear and crafting materials make braving the Iron Hold‘s terrors worthwhile!
Loot & Reward Analysis
Now let‘s analyze the rewards from a statistical perspective after clearing the Iron Hold over 20+ times:
Average Run Duration: 45-60 minutes
Average XP Gained: 22 million
Gold Earned: 53,000
Loot Quality: 2-3 Legendaries, 5-8 Set Items
- Fastblood Aspect – Reduces Necromancer cooldowns (guaranteed drop)
- Coldblood Obsidian Pauldrons of Fortification – Powerful Shoulders providing armor and resistances
- Wailing Host of Eternal Lament – Legendary Necromancer Phylactery
I recorded over 12 Legendary items and 45 Set piece items during my Iron Hold completions. This places it comfortably among Diablo 4‘s most lucrative dungeons per time invested, especially with the Fastblood reward.
Compared to similarly challenging endgame dungeons like the Blind Barrows and Flooded Mine, Iron Hold features more intricate environmental navigation challenges, shorter completion length, and better XP efficiency.
However, the cramped layout and devastating abilities of Scourge demand peak mechanical performance compared to more forgiving dungeon bosses. I highly recommend Iron Hold runs once your character has sufficient defensive and mobility output capabilities.
Attempting Iron Hold Early On
During my initial forays into the Iron Hold around level 40, I vastly underestimated the relentless enemies and punishing attacks from Scourge. My fireball-slinging Sorceress build struggled with sustain and avoiding threats in the claustrophobic spaces.
I wish I had known earlier how important stacking resistances and utilizing crowd control abilities would be! My advice is delay braving these depths until breaching level 60, where power spikes like tiered armor sets and base skill upgrades provide the tankiness to endure.
Once I returned after boosting defenses and upgrading to exceptional rarity gear, the prior difficulties seemed trivial! Hard-learned lessons about responding properly to enemy telegraphs enabled me to dance circles around lumbering enemies.
Nevertheless, few gaming moments parallel finally conquering the Iron Hold‘s sinister depths after bitter initial failures! My journey from fledgling spellcaster to champion of Hawezar shall forever be etched in memory.
Final Tips for Conquering Iron Hold
Before concludes this extensive walkthrough guide, I want to share some final tips for achieving victory:
- Stack resistances, armor, and other defensive layers to counter dangerous enemy strikes
- Practice evasion techniques like dashing and blinking to avoid deadly slams and explosions
- Quickly eliminate priority targets like healers and riflemen hiding behind frontlines
- Bring health and mana recovery potions to enable sustainability during longer sections
- For Scourge specifically, save high burst damage abilities and ultimate moves for key moments around 75% and 50% health
- Familiarize yourself thoroughly with attack animations and patterns to recognize windows of opportunity
I wish you glory and fortunes beneath Castle Rakhat! May the Fastblood Aspect serve you and the spirits of the Iron Hold find liberation at last from Scourge‘s cursed grasp.
This is master dungeoneer Roland signing off…see you beneath Sanctuary!