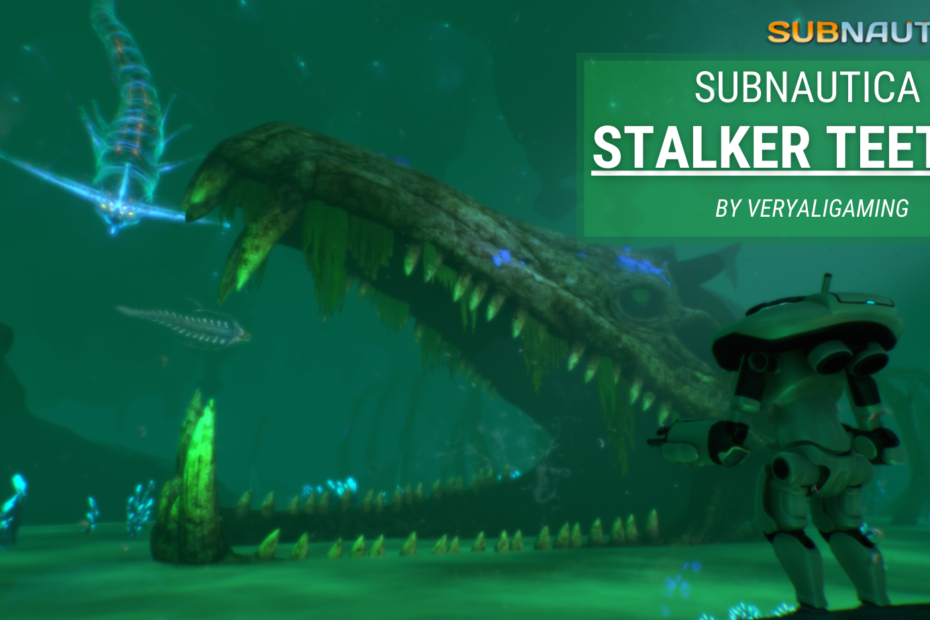

Surviving the depths of an alien ocean in Subnautica can be tough, especially when aggressive wildlife like Stalkers are lurking in the shadows. As an experienced player, I know the frustration of having these hunters ambush and destroy me just as I exit my base!
While intimidating, Stalkers have a useful resource for players—their sharp teeth. Gathering Stalker teeth is essential for crafting important items like enameled glass, so farming them efficiently is key.
In this ultimate guide containing tips from my hundreds of gameplay hours, we’ll cover everything you need to know about gathering Stalker teeth safely. You’ll learn stalker behaviors, attack patterns, the best biomes and locations to hunt, stealth and aggressive hunting approaches, and even late game shortcuts for maximizing your hauls.
Grab your diving gear, and let’s get started!
What Are Stalker Teeth Used For in Subnautica?
Before we dive deeper, let’s review why Stalker teeth are so valuable for crafting:
- Enameled Glass – 2 Glass + 1 Stalker Tooth = 1 Enameled Glass. A common component for vehicles and bases.
- Bioreactor Fuel – Inserting Stalker Teeth produces 70 energy units per tooth. Very efficient!
- Crafting Equipment – 1-2 teeth needed for specific late-game tools and upgrades like the Stillsuit.
Having surplus Stalker teeth on-hand is incredibly useful for this essential crafting across the entire game. Now let’s overview stalker attack behaviors so you know what we’re up against!
Detailed Stalker Attack Patterns and Behavior
Stalkers are aggressive predators that ambush passing swimmers using hit-and-run tactics:

1. Stalking – Stalkers bury themselves under kelp leaves and the sandy ocean floor, camouflaging and waiting silently to ambush prey. Their coloration provides near perfect hiding.
2. Charging – When the player swims near a hiding Stalker, they detect your movements and vibration. Triggered Stalkers explode out from hiding and rapidly charge at you! If caught off guard, this initial hit deals a devastating 35 damage.
3. Retreating – After hitting or biting their target just once, Stalkers will quickly retreat back under cover 3-5 meters away without attacking again immediately. They return to stalking mode before repeating their ambush.
4. Intimidation – Interestingly, Stalkers also have an intimidation display if outmatched. When attacked by stronger predators like Reaper Leviathans, Stalkers will fold down their face plates and emit a unique crying sound before fleeing the area.
Their camouflaged ambushes and hit-and-run technique makes Stalkers incredibly challenging to deal with using basic equipment. But by understanding their attack methodology, we can flip the hunter into the hunted!
Next, let’s overview exactly where to find Stalkers.
All Biomes and Locations To Find Stalkers
Stalkers spawn mainly in Kelp Forests and the Crash Zone. But thanks to their versatility, populations can spread aggressively into adjoining biomes in the late game.
Here are the most common locations and biomes to encounter Stalkers:

Kelp Forest – The most plentiful and reliable location. Stalkers blend into the swaying kelp stems perfectly. Recommended for beginner tooth hunts.
Coords: -500, -150 meters
Crash Zone – A dangerous biome littered with ship wreckage that attracts scavenging Stalkers. Rich in Salvage for bait. Caution – Reaper ambushes!
Coords: -1500, -200 meters
Grassy Plateaus – Stalkers will migrate here from the Crash Zone or Kelp borders. Open areas make them easier to spot.
Coords: -300, -200 meters
Grand Reef – Attracted by the abundant Scrap Metal, migrating packs sometimes colonize the colorful floor of the Grand Reef.
Coords: -1150, -800 meters
Focus your initial Stalker hunts in the Kelp Forests and Crash Zone. As those populations thin from over-hunting, you can venture to the other biomes to find fresh territory.
Now let’s get into the tactics and approaches to safely gather Stalker teeth.
Gathering Stalker Teeth Early Game (Stealth Method)
When you first encounter Stalkers, your equipment is extremely limited. You lack defenses, powered transportation, and weapons to directly fight back.
Stealth is absolutely key to surviving early hunts against Stalkers‘ hit-and-run attacks. As a Stalker ambush can nearly one-shot unarmored new players, caution is critical!
Here is the safest method to start gathering Stalker teeth:
What You‘ll Need
- Survival Knife – Essential for emergency defense. Does 8 damage per slash to deter attacks.
- 2+ Metal Scraps – This basic junk will lure Stalkers when they need to scavenge.
- Habitat Builder (optional) – Construct an emergency hidey hole if cornered.
Step-By-Step Process

Venture near Stalker territory during daytime hours when they are less aggressive. Move slowly and limit your limb movements to not catch attention.
Scan for Stalkers buried under kelp using your scanner tool. Take note of where each ambush point is located.
Place 1-2 Metal Scraps in open sandy areas 15-20 meters apart. Space out scrap piles so Stalkers won‘t compete over one bait pile.
Retreat 25+ meters away to a safe observation spot with good lines of sight on the scrap piles. Stalkers avoid investigating bait if you remain too close.
Wait patiently for a curious Stalker to snatch the scrap. They will burst from their hiding spot, snag the bait, and likely drop 1-2 teeth in exchange! This is your opportunity to dash in.
Carefully swim out once the Stalker retreats and gather any teeth dropped in the sand. Be swift – lingering too close will attract the Stalker back.
Use habitat builder pillars to craft impromptu shelters on your way back that you can duck into if ambushed again.
Deposit teeth safely back at base before returning to repeat the process! More scrap piles means more opportunities for Stalker teeth.
This safe "trap" approach takes advantage of Stalkers‘ scavenging habits. The temptation of an easy metal scrap meal is too appealing for them to ignore, despite potential danger. And when they grab the bait, that split second is your window to dart in and steal any teeth dislodged in their haste!
Now that you know the basics of early game Stalker hunting, let‘s talk advanced tactics. Veterans have a much more aggressive (and dangerous!) method…
Mid/Late-Game: Directly Hunting Stalkers
Unequipped new survivors stand little chance surviving a Stalker ambush head-on. But progressing in Subnautica unlocks far stronger options to overpower Stalkers, including:
- Vehicles (Seamoth, Prawn Suit)
- Powered weapons (Stasis Rifle, Perimeter Defense System)
- Upgraded diving gear
By equipping these enhanced tools, experienced divers can directly attack Stalkers instead of luring them with metal scraps. It‘s far riskier, but gathers incredibly more teeth far quicker!
Here‘s how seasoned veterans actively hunt Stalkers:
What You‘ll Need
- Seamoth or Prawn Suit – Essential for safe confrontation. Perimeter defense module recommended.
- Stasis Rifle/Survival Knife – Immobilize Stalkers briefly to land lethal collisions.
- Extra Batteries – Weapons and vehicles drain power quickly.
Step-By-Step Process

Explore Stalker Kelp Forests or Crash Zone with your Seamoth or Prawn Suit. Ensure weapons and defenses are equipped!
Listen for ambient Stalker roars – They make very distinct metallic cries before ambushing. Pinpoint buried locations.
Activate stasis beams on alerted Stalkers right as they charge you, if possible. This locks them in place for a direct hit!
Ram Stalkers at full speed with your vehicle after they break stasis. The impact should kill them instantly!
Quickly scan for 1-3 teeth drops from the collision site and nab them.
Purge stasis beam heat, recharge batteries, and repair vehicles between battles. Never let your guard down!
Venture to the next biome once the Stalker population thins from over-hunting. Repeat the search and destroy process!
This action-packed method dominates Stalkers using late-game firepower. A max upgraded Prawn Suit or Seamoth can easily tank hits while dishing lethal damage.
However, veterans can still fall prey to basic mistakes:
- Never exit your vehicle near Stalkers or you‘ll be defenseless.
- Flee the area if Power Cells or Health fall critically low.
- Stock excess batteries and repair materials before each hunt.
Follow those tips, and you‘ll conquer Kelp Forests in no time! Next, let’s cover final optimizations for veterans.
Additional Stalker Farming Tips & Shortcuts
Veterans can further amplify their Stalker hunts with these pro tips:
Salvage Wrecks For Bait Sources
Crashing into Stalkers drops teeth, but we need scrap metal piles to attract them first. Never pass up scavenging shipwrecks!
Debris piles and sealed containers found inside wrecks often contain 1-3 Metal Scraps each. Hoard this salvage to keep bait on hand for your scrap traps between hunts.
Use Scanners To Pinpoint All Dropped Teeth
Once obtaining a Scanner Room HUD Chip, all resources dropped on the ocean floor are automatically pinned for you – including Stalker teeth!
This removes manually combing the seabed for lost teeth after battles. The HUD markers instantly identify all items in range, allowing quick grab n’ go.
Combined with the lethal vehicle attack strategies above, Scanners let you rapidly snowball bountiful Stalker tooth hauls.
Craft With Stalker Teeth Frugally
Many essential tools require 1-2 Stalker Teeth to craft. Before mass fabricating, ensure you have enough teeth stockpiled:
| Item | Teeth Needed |
|---|---|
| Enameled Glass | 1 tooth per glass |
| Stillsuit | 2 teeth |
| Ultra High Capacity Tank | 2 teeth |
Stealth vs Aggressive Hunting: Pros and Cons
We‘ve covered both stealthy trapping techniques and aggressive vehicle attacks for gathering Stalker teeth. But which method works best?
Here‘s a comparison of the major differences:
| Tactic | Stealth Traps | Aggressive Hunts |
|---|---|---|
| Safety | Very Safe | Risky |
| Effort | Low | High |
| Yield Per Run | Low (2-6 teeth) | Very High (10-25 teeth) |
| Difficulty | Beginner | Advanced |
| Time Investment | High | Low |
| Best Gear | Seaglide/Fins | Prawn Suit/Seamoth |
Ultimately there is no "better" option – both tactics remain viable for different playstyles.
- Stealth traps are extremely safe, easy scaffolded practice for newcomers with minimal gear. But yields per run are low.
- Vehicle attacking requires mastering many late-game systems, but effortlessly crushes endless Stalkers once learned.
Veterans may want to combine both approaches:
- Use stealth traps early on to safely collect initial starter teeth as needed.
- Once late-game geared, transition to aggressive hunts for mass farming!
This dual strategy keeps you stocked the entire game.
Closing Thoughts
And there we have it – everything you need to master gathering Stalker teeth, from early stealth tricks to late-game extreme hunting! Here’s a quick recap:
- Stalkers have camouflage and hit-and-run ambush tactics making them dangerous. But their teeth are valuable!
- The Kelp Forest and Crash Zone contain the most plentiful Stalker spawns to hunt.
- Early game, stealthily lure Stalkers using metal scraps. Grab the 1-3 teeth they drop when distracted.
- Late game, aggressively hunt Stalkers using Prawn Suits/Seamoths. Ramming them drops 10+ teeth per battle!
- Further optimize hunting by scanning wrecks for bait scraps and equipping Scanner Rooms to instantly locate all teeth drops.
I hope these tips from hundreds of hours of gameplay help you conquer Stalkers and mass farm teeth for yourself. Let me know in the comments if you have any other great strategies! Fear the roar no more. Happy diving!