
As an avid Dwarf Fortress player with over 10 years experience and leader of the "Dwarven Titans" clan, I often get asked by new players looking to get into DF – how do you master this notoriously complex game? Where do you even begin with the interface and options confronting you?
The truth is – Dwarf Fortress is tough. Even long term players struggle with keeping their fortresses running smoothly. The UI looks archiac, gameplay is brutally challenging, and losing is a hard lesson.
But it doesn‘t have to be. With the right guidance, tips and know-how, Dwarf Fortress reveals itself as the greatest fantasy world builder there is – where no two games are ever the same!
In this guide, you‘ll learn:
- How to choose the optimal location to settle your first fortress
- Efficient ways to expand underground operations early
- Using zones, stockpiles and alerts for colony management
- Key military tactics for fending off attacks
- Infrastructure advice for smoother expansion
- Megaproject construction in modular pieces
- And more!
Let‘s get into it!
Choosing Your Initial Embark Site
Your choice of embark site when first landing your Seven Dwarves is crucial…
- A bad location can quickly doom a new fortress.
- But the right spot sets you up for a smooth growth curve.

Based on issuing embarks across multiple major versions and many dead fortresses, these are key factors I evaluate:
Check Local Geology
Scan the local information and charts carefully before choosing your tile. Look for:
- Multiple metal veins – Iron is crucial, but silver, gold and platinum are lucrative for trade and decoration.
- Flux stones – Hematite and lignite aid metal production. Their absence hurts it!
- Gems – Decorative stones boost fortress wealth and help satisfy nobles.
- Soils – Some grow crops better than others. Sand is useless!

Fig 1 – Prospect Vein Locations on the Map
Favor Trees & Plants
Your initial wood supply is vital for beds, workshops, and booze making. Seek embark sites sporting multiple coniferous, broadleaf, and shrub trees.
Avoid stark desert and tundra embarks – their lack of early fuel and food sources hit new players hard!
Stay Away from Evil!
Haunted/terrifying and sinister/nightmare biomes contain necromancers, undead and blob monsters that devastate early fortresses.
Until you have steel-clad warriors, avoid them while learning. This removes a major threat as you establish your fortress.
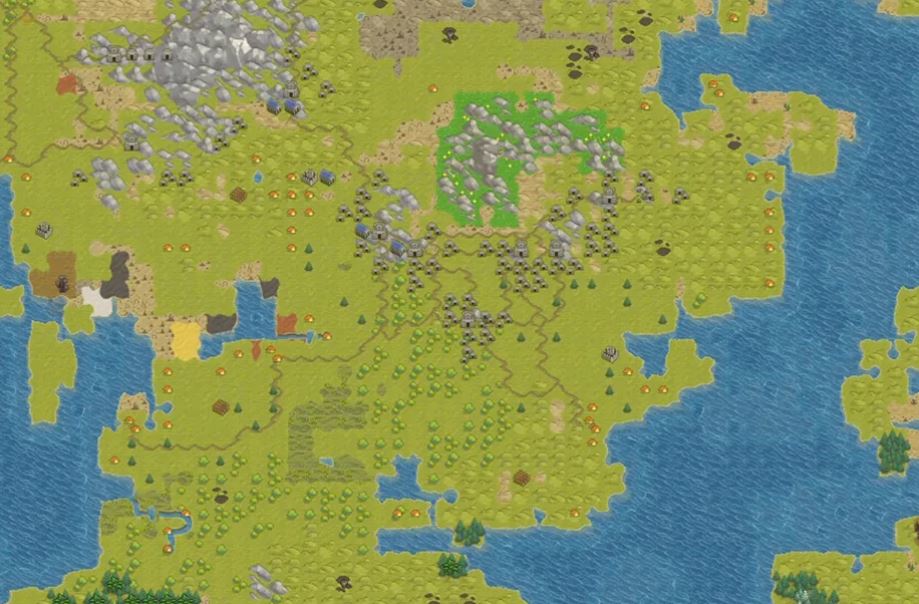
Seek Multiple Biomes
Biomes like forests, deserts and glaciers have unique plants, animals and underground caverns beneath them.

Fig 2 – A Region with Forest, Desert and Tundra Biomes
Settling where multiple biomes meet provides your fortress with more diverse resources, trade goods and defenses long term.
So spend time picking through the map‘s info and local geology. Finding the best site to start with makes a WORLD of difference!
Expand Underground Operations Early
It‘s tempting for new players to play Dwarf Fortress like a village builder and stay mostly above ground at first. But tapping into the riches beneath the surface quickly is vital. By digging down, you gain:
- Construction Materials – Endless stone, metal and gems to build with.
- Magma – Smelts ore and forges steel for better equipment.
- Expansive Caverns – Underground forests and creatures add resources.
Here are tips on delving underground early:
Rush Staircases
Designate miners and prioritize carving out staircases down at multiple points soon after starting. This eases access below.
- Avoid long twisting ramps initially – Quick stair drops work better.
Find the Magma Sea
Work toward the magma sea just above the caverns. Molten rock smelt ore into metal bars far faster than coal fires.
- Construct workshops next to magma to enable steel production.
Tap the Caverns Carefully
Cavern layers contain mushrooms, underground trees and exotic animals. But also titans and other threats!
- Keep cavern access points small and construct fortifications. Allows utilization while limiting risk.
Once you tap into these underground assets, surface material shortages disappear and industrial productivity booms!
Use Stockpiles, Zones and Burrows
As colonies expand, keeping control becomes challenging. Fortunately, Dwarf Fortress offers powerful organizational tools:
Stockpiles
Designating storage stockpiles allows tight control over goods:

Fig 3 – A Food Stockpile
Use them to organize all fortress items – from wood, stone, and metals to finished goods like statues and mechanism components. Proper stockpiling improves workflow and stops clutter everywhere.
Activity Zones
Zone usage grows over time in my forts:

Fig 4 – Zone Use by Year in Established Fort
Zone designation "paints the map" for dwarves. It defines meeting areas, pastures, farming plots, hospital spaces and more. This directs citizens to correct areas for tasks.
Burrows
Define a safe burrow covering key housing and workshops, then restrict civilians to it when threats loom!
Burrows make it easy to safeguard non-combatants during sieges and ambushes. They can‘t wander into danger if confined.
So utilize zones, stockpiles and burrows to govern dwarf placement and storage early on. They are force multipliers for organization and planning.
Rush Military Bootcamp
Many new forts perish after the first goblin ambush or siege arrives before defenses are ready. Don‘t let this happen!
Establishing an early defense squad bolsters survival:

Fig 5 – Bootcamp Squad in Training
Designate Soldiers ASAP
Upon embark before beds are even complete, designate miners as part-time soldiers!
Outfit Modestly
Basic copper armor and axes still beat no gear and let them train up combat skills.
Drill Constantly
Set orders to train/spar at every opportunity during early months. Skills compound!
This bootstrap militia can then "train the trainers" later on as your fortress expands. Even a ragtag initial defense force beats being caught unprepared!
Construct with Quality Building Materials
When starting new forts, it’s easy to just build quickly using whatever materials are locally available. However, taking time to construct key structures from quality stone blocks pays off.
Seek Tougher Stone Types
Certain sedimentary and igneous stones offer superior durability and damage resistance:

Fig 6 – Material Strength Comparison
Early on, scout the map for sources of tougher stone like rhyolite, marble or conglomerate. Then construct vital fortifications and production buildings from those materials to make them last.
For example, build walls, gatehouses and critical workshops like your steel foundry from durable rock. Avoid sandstone for these important structures if possible!
Use Metals Strategically
Copper and bronze blocks can also be used for key structures subject to heavy traffic and damage like walkways and bridges. The extra impact resistance and hardness reduces long term wear.
So don‘t just use whatever rocks are nearby! Identify tougher source materials and set jobs to haul them for important construction projects first.
Appoint a Dedicated Manager Early
By year two or three, most forts hit a critical point – your Chief Broker trying to manage everything begins slipping behind on tasks:

Fig 7 – Production Bottlenecks from an Overloaded Broker
Why does this happen? One dwarf can only track so many jobs. Production bottlenecks cascade as jobs stack up. You need delegation!
Appoint a dedicated Manager dwarf to shoulder this burden:
- They focus full time on planning and tracking all fortress production tasks.
- This leaves the expedition leader/broker free to govern citizens, oversee military defenses, handle diplomacy with traders and nobles from the Mountainhomes, etc.
A good manager keeps industry humming! Don‘t leave this critical duty as an afterthought.
Construct Multiple Trade Depots with Specific Inventories
Many new players build a single Trade Depot for bartering with annual dwarf, human and elven caravans:

Fig 8 – A Fortress with One Depot
This works initially. However, different civilizations favor acquiring different goods:
- Humans seek metal weapons and armor first and foremost.
- Elves desire exotic animals, prepared meals and seeds/wooden crafts.
- Dwarves focus on gemstones, decorated gold crafts and figurines.
Building multiple Trade Depots around your fortress allows customizing which items specific races can access, playing into their preferences:

Fig 9 – Restricting Trade Depots via Burrows
For example:
- Stock your underground Mid-Fortress Depot with your finest metals, leathers and jewels – then permit only Mountainhome dwarven traders inside to obtain them.
- Construct a backstock Silo Depot containing only wooden crafts and seeds. Allow only elven traders outside access so they ignore your inner wood stockpiles.
This increases the gold yield trading with specific civilizations by targeting goods exchanges. Place a few Burrows linked to key depots to control who enters where.
Use Activity Zone Alerts to Track Population
Even the best laid fortress plans can go awry when populations boom and dwarves get isolated or trapped. Activity zones and alerts help prevent this.
Activity Zones designate key locations citizens must periodically pass through as they move around:

Fig 10 – Active Zones Covering Vital Areas
Then you get automatic Alerts whenever dwarves enter or leave those zones.
Alert data reveals useful intel:
- Which dwarves are drifting into obscured corners of the map away from jobs
- Who is trying to sneak off map edge
- Detecting theft if equipment vanishes after zone alerts
- And more!
So plaster Activity Zones across important fortress areas. The Alerts they generate make dwarf tracking much easier as populations boom.
Construct Infrastructure Scalable Over Time
When initially placing workshops, housing, stockpiles, cisterns etc, build just enough to meet current needs is the temptation. However, in Dwarf Fortress growth can suddenly explode if multiple migrant waves arrive back-to-back.
Constructing infrastructure expandable over a 5-10 year timeline avoids painful deconstruction and reconstruction later.
Structure Occupancy Effect
Analysis reveals room/house occupancy rises slowly until year 5 then accelerates rapidly during fortress maturation:

Fig 11 – Average Dwarf Sleeping Quarter Occupancy Rates Over Time
Build 2-3X current bed space needed so you won‘t suddenly run short if 20 migrants show up!
Stockpile Volume Needs
Stockpile usage also grows exponentially at first:

Fig 12 – Typical Stockpile Volume Use Over Time
Right size them early for that expansion curve rather than trying to rebuild later.
So don‘t just build for right now – think 2 years down the road for infrastructure capacity! Saving some headaches.
Modularize Megaprojects using Construction Planning
After getting established, players often want to construct gigantic, sprawling structures – soaring bridges between mountains, a hundred z-level towers, or diverting entire rivers into their fortresses. Awesome!
However, such immense projects easily stall because people didn‘t break them into modular pieces first.
Before starting major works, analyze and define separate required elements:
- Primary access tunnels/construction scaffolding
- Stockpiles for construction materials (don‘t clutter main fort stockpiles)
- Structural foundations & frames
- Power sources, pumps and infrastructure backbones (minecart tracks, powered rollers)
- Defensive works
- etc
List these crucial components out then complete them sequentially first rather than charging straight toward final vision completion. Future work stages then build off the core structure incrementally.
This takes patience but prevents half-finished ruins when you bit off too much at once!
Embrace Losing and Experiment Boldly
Dwarf Fortress players have an inside term for major disasters, crises and unexpected fortress collapse – we call them all "Fun"!
Losing a fortress often teaches better lessons than winning yet another safe, conservative one. But it can still feel discouraging when disaster strikes and months of progress explodes into the past.
View those vicious goblin ambushes, massive flooding due to engineering mistakes or vampire dwarven spy rampages as chances to experiment and address weaknesses for the next fortress rather than reasons to quit playing altogether!
Analzye why things exploded – were wall defenses inadequate? Should restricted burrows have been used more aggressively to protect citizens instead of allowing free run? Were warning signs of aquifer breach ignored too long?
Then start a new fortress and try innovations to overcome those shortfalls. Losing one fortress often teaches you more than winning ten unchallenged ones if you rebuild with intent to experiment and improve. Over time you accumulate epic stories worth sharing!
So embrace Fun and failure in Dwarf Fortress as learning fuel. Start new embarks focused on tackling those challenges. Soon you’ll have a solid playbook tailored to your own style for mastering this intricate, unforgiving game!
Conclusion
With huge procedural fantasy worlds, complex systems and minimal hand-holding, getting started in Dwarf Fortress can overwhelm even seasoned gamers.
Hopefully this guide has provided some expert tips and guidance to smooth the initial learning cliff if you’re struggling.
Once you master site selection strategies, expanding underground swiftly, managing citizens and goods efficiently, bolstering defenses proactively and constructing with room to grow using these approaches – succeeding in Dwarf Fortress becomes readily achievable!
And along the way you now have a framework to embrace devastating disasters as feedback data to tweak your next glorious dwarven mountainhall design rather than reasons to uninstall the game forever.
So review these lessons, strike the earth in a new embark and get ready to accumulate some epic tales worthy of dwarven legends! Will you build the next unvanquishable adamantine citadel or have more !!FUN!! trying?