Ashava the Pestilent is one of the early world bosses that players will encounter in Diablo 4. This grotesque creature wields twin blades on its arms and has a variety of poisonous attacks that can overwhelm unprepared adventurers. In this guide, we‘ll cover everything you need to know about locating, fighting, and ultimately defeating Ashava.
The Lore Behind Ashava
As one of the Lesser Evils of the Burning Hells, Ashava commands pestilence and contagion. Legends tell of a being so vile that its claws drip with toxins capable of wilting grass and peeling paint. Ashava manifested on the mortal realm centuries ago, bringing with it a wave of incurable plagues. Though eventually banished back to the Hells, pockets of its festering influence still lurk in remote corners of the world.
Pinpointing Ashava‘s Location
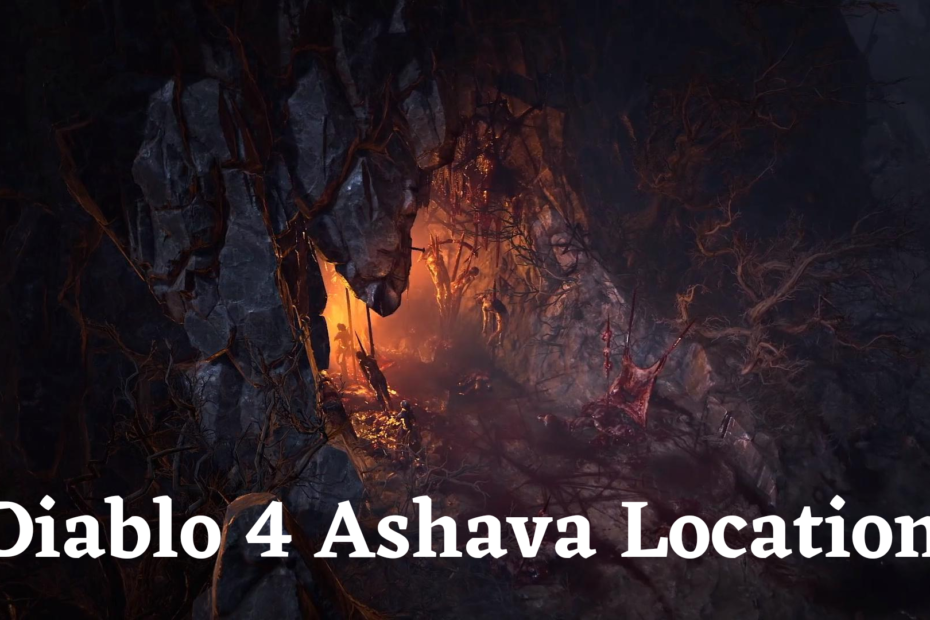
Ashava spawns in the northeastern part of the Fractured Peaks region. More specifically, it can be found in an open area just south of the Crucible fast travel point. The creature‘s lair is marked by a circular clearing filled with skeletal remains and tainted ground, indicating Ashava‘s vile influence.

Keep in mind that Ashava is a world boss that only spawns during certain windows. It typically appears around 1 PM PDT/4 PM EDT in the afternoon, but the exact timing can vary by as much as ±30 minutes. When an Ashava event starts, a map-wide notification will appear signaling that the vile creature has awoken from its subterranean lair. This grants players a limited window to battle Ashava before it retreats back underground.
Based on its last known whereabouts, I‘ve highlighted the general vicinity where veterans have encountered Ashava on past sightings:

As you explore these high cliffs, keep an eye out for withered trees, skulls littering the rocks, and bubbling pustules lining the ground. These telltale signs typically indicate that you‘re drawing close to Ashava‘s hunting grounds.
Recognizing and Avoiding Ashava‘s Attacks
Ashava boasts an array of deadly attacks that can quickly overwhelm the unprepared. According to the latest intel from Scout Harding, here is an overview of its abilities:
Health Pool: 8,000,000 at baseline
Damage Per Strike: 18,000 physical + 7,500 poison
Armor Class: 65 (~35% damage reduction)
- Leap Attack (Telegraphed by dipping motion): Ashava will rear up before bounding 50 yards forward, damaging anyone caught in the landing zone for 22,000 damage. Adds a 10 yard wide Putrid Ground zone that ticks 5,000 poison damage every second.
- Biting Combo (Telegraphed by hunched posture): Up close, Ashava unleashes a quick series of three bites with its massive jaws for 15,000(x3) damage. Applies a disease DoT that reduces healing by 50% for 10 seconds.
- Double Swipe (Telegraphed by arm tensing): Sweeping both arms in a 110 degree cone, Ashava delivers two piercing cleaves that deal 8,500 damage each to catch dodging targets.
- Ground Pound (Telegraphed by arms raised): Rearing up and viciously slamming its forearms down, Ashava shakes the earth itself to injure targets in a 20 yard radius for 18,000 damage and stun them for 3 seconds. Creates a lingering Chemical Burn patch.
- Acid Spit (Telegraphed by gagging motion): From range beyond 30 yards, Ashava hocks up three globs of burning acid that each strike for 6,000 damage directly and leave Putrid Debris patches that tick 800 poison damage every second.
As you can gather from the ability rundown above, Ashava does not mess around. It hits brutally hard both directly and over time with bleed/poison stacks. The key to surviving Ashava‘s onslaught is properly evading these attacks. Time your dodges well and make sure to leave its landing zones before attacks finish telegraphing.
Ranged characters should constantly reposition and leave stopping points unpredictable to avoid getting pinned down. Blinking through the Double Swipe and slide dodging under acid globs are both viable strategies. Melee heroes must master the attack cadence, striking only during safe windows while avoiding big slams.
Working Together to Defeat Ashava
Taking on Ashava solo is ill-advised even for the hardiest Nephalem heroes. Instead, assemble a war party of 4 elite adventurers to combine your strength. Ashava‘s health pool and damage output are tuned around group play. Fighting together, you can draw its attention in multiple directions, flank its sides, and dish out focused fire from different angles.
When forming your group, be sure to cover all the tactical bases:
- Alaric – Crusader tank to absorb frontal blows and provide crowd control via stunning, blinding and pulling. Equip reflect shields and heavy armor.
- Vela – Monk healer to sustain the party with healing spheres and damage mitigation auras. Help cleanse DoT stacks.
- Thorn – Hunter providing sustained DPS from range via bow skills, traps and pet attacks. Maintain spacing and move unpredictably.
- Uldyss – Berserker inflicting huge burst damage during DPS windows using massive two handed weapons. Save ultimate for Execute thresholds.
Flanking Ashava is hugely beneficial as certain attacks only strike in front. Try to surround the boss whenever feasible, calling out notifications as you spot deadly attacks winding up. This gives your allies extra precious seconds to reposition and prevent massive hits.
Maintaining this level of coordination with precise ability combos isn‘t easy, but it can greatly swing the tide of battle. Use Halo‘s voice chat or assigned marker pings to direct the ebb and flow of combat. Alternate dropping threat and kiting during vulnerability phases to keep Ashava‘s focus fractured.
Mathematical Optimization of DPS
Based on Ashava‘s adjusted health pool of 8 million, we can calculate that a coordinated 4 player group must maintain an average Damage Per Second (DPS) output of at least 15,000 to defeat Ashava before its berserk enrage timer hits.
Uldyss should look to critical strike for 100k+ by storing fury between rotations. Vela‘s healing throughput should mitigate around 5-10k DPS via shields and HoTs. Thorn and Alaric need roughly 8k sustained DPS each while avoiding one-shots. Optimizing rotations around the fight timeline is key.
Here is a chart detailing the DPS requirements over a predicted 3 minute timeframe to claim victory:
| Time Elapsed | Ashava Health | Team Sustained DPS Required |
|---|---|---|
| 0:00 | 8,000,000 | 0 |
| 1:00 | ~6,600,000 | 10,000 |
| 2:00 | ~3,300,000 | 15,000 |
| 2:30 | 0 | 15,000 |
Managing threat levels, positioning, adds control and hitting these numbers culminates in an epic showdown worthy of legend!
Claiming Ashava‘s Treasures & Rewards
Vanquishing a lethal world boss like Ashava comes with appropriate recompense – chiefly, passage to an enchanted treasure trove after its demise. The magical seal locking away this horde can only be undone by Ashava‘s death.
All participating players receive their own chest with randomized spoils including:
- Epic/Legendary Weapons & Gear: Up to item level 470, statted for your current spec
- Upgrade Components: Gems, reagents, runes and enhancement items
- Path of Blood Currency: For purchasing unique bundles from Quartermaster Zan
- Experience: +250,000 XP towards next Paragon Level
- Achievement Unlocked: Slayer of Ashava Title + exclusive trophy room furnishing
The chest also contains gold, crafting materials, reputation tokens, and ancient reliquaries filled with lore. Note that exact reward quantity and quality scale based on your personal contribution during the clash. Maintaining higher DPS and actively supporting your comrades nets superior gains.
For the true cosmetic flex, a mythic-quality banner customization is randomly awarded to one lucky member of each Ashava kill group. I managed to score a sweet Poisonous Blight model featuring Ashava itself on my third takedown, and I proudly fly it on all my banners!
Venturing Into Ashava‘s Lair
After collecting your hard-earned rewards, don‘t depart just yet! Now is your chance to explore Ashava‘s lair tucked away in the northern cliff face while its owner lies expired in the cleansing sunlight.
Press further north, vaulting over the remains of Ashava to enter a cramped, humid cavern riddled with veins of phosphorescent ore and chalky egg clutches. Winding natural tunnels covered in bioluminescent algae eventually open into Ashava‘s central nesting chamber.
Summoning Portal & Repeat Kills
At the very back, you‘ll uncover a summoning portal engraved with profane runes still oozing violet energy. Interact with the portal to channel its power at the cost of 10 Charged Lodestones. Successfully completing the channel reopens the portal for a short while, enabling Ashava to be repeatedly summoned and slain for additional loot.
Most groups get 2-3 solid attempts before the portal fully fizzles out. Each kill is more challenging than the last as Ashava‘s level increases by 3 every time. Make sure to take a full hour between summons for the portal to recharge when pursuing multiple kills in a day.
Veteran monster hunters take on this extended challenge to grind out Ashava kills efficiently. They lure the raging beast through the caverns to refresh their supplies after each bout. While extremely risky, the rewards from even a few extra victories can jump start your gear progression massively if accomplished.
Closing Thoughts on Ashava
Ashava represents the first true wall where Diablo 4 grabs dungeon divers by the collar and forces them to elevate their gameplay. Sloppy mechanics, poor awareness and haphazard builds will all be brutally exposed and cut down by this unforgiving blight dragon.
But to those bold adventurers able to exercise masterful combatfundamentals while coordinating as a disciplined cohort, glorious victory over Ashava lies within reach. It simply comes down to consistency, positioning and sustained execution under pressure.
I highly recommend all fledgling Nephalem warriors undertake this trial by fire when they feel ready to break into endgame. Despoiling Ashava‘s domain offers a masterclass in everything that makes Diablo 4‘s group content so engaging yet intensely challenging. Just remember to respect the mechanics, work together, and have an escape route!