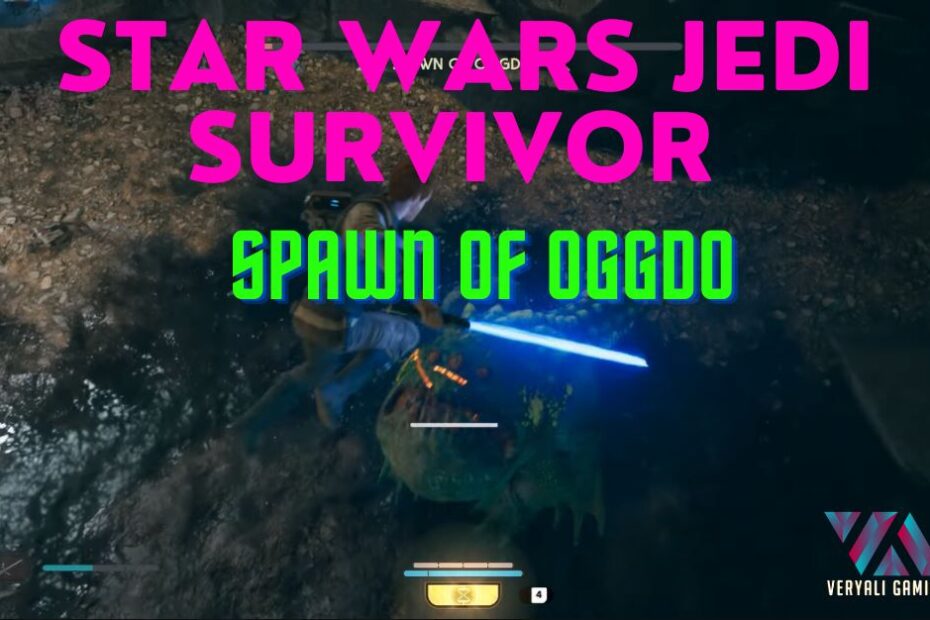
The Spawn of Oggdo is one of the most notorious bosses in Star Wars Jedi: Survivor. This massive frog-like beast rules the tunnels beneath Fort Kah‘Lin on Koboh, attacking any foolish enough to venture near its domain. Many bold Padawans have met their end in this creature‘s jaws.
As a seasoned Jedi Survivor player, I can personally attest to the dangers of this fight. Across multiple playthroughs, the Spawn has killed me more times than any other boss. But the intense satisfaction of finally defeating this vicious predator makes it one of the most rewarding encounters in the entire game.
In this comprehensive guide, I‘ll leverage hard-won experience from my Jedi career to reveal optimal strategies for toppling the Spawn. From attacking patterns to gear recommendations, I‘ll cover everything you need to emerge victorious from this acid-spitting frog‘s lair.
Locating and Reaching the Spawn of Oggdo
Before battling a deadly beast, it helps to know where its lair lies! The Spawn of Oggdo makes its home in the tunnels beneath Fort Kah‘Lin on Koboh. Specifically, its arena is located under a circular platform connected to the fort‘s bridges.
To reach this fateful battleground, head first to the meditation point inside Fort Kah‘Lin (see map below). From the mediation room, grapple up to the tower adjoining the fort‘s northern bridge. Cross the bridge to the adjacent tower, dealing with or evading any First Order troops patrolling the fort.

After unlocking the tower door controls, look right to spot a circular platform across a chasm – this leads down to the Spawn‘s lair! Use your Jedi mobility skills to traverse the gap – I prefer double jumping into a Force dash. Drop down through the platform aperture to trigger the dramatic boss fight introduction.
Gearing Up to Fight the Spawn of Oggdo
Entering any boss battle unprepared is asking for disaster, so let‘s discuss ideal equipment and skill loadouts before confronting the Spawn head-on.
Lightsaber and Equipment
I highly recommend entering this duel wielding a fully-upgraded double bladed lightsaber. The extended melee range helps land extra strikes on the Spawn between its attacks. Before dropping in, craft any available lightsaber upgrades and stim canister upgrades – you‘ll need the extra durability and healing.
Outfits and Force Skills
The Spawn‘s arena offers little cover, so prioritize mobility over defense when choosing Cal‘s outfit. I prefer the agile Climber or Scrapper gear sets for their movement bonuses. As for Force powers, make sure to equip Force Slow and Force Push – both prove invaluable against the Spawn‘s devastating strikes. The extra dash from Valor Surge: Temperance can also prove lifesaving.
Recommended Tactical Upgrades
| Tactical Upgrade | Effect |
|---|---|
| Stim Efficiency | Stims recover more health and last longer. |
| Saber Throw Cost Reduction | Reduces Force cost for powerful ranged attack option. |
| Blocking Stamina Upgrade | Essential for handling Spawn‘s relentless assault. |
Spawn of Oggdo Attack Patterns and Counters
Now, let‘s break down the intricacies of combat against the Spawn of Oggdo itself. This abomination alternates between seven main attacks that deal punishing damage if not properly countered:
Bite
Attack Telegraphs: The Spawn rears back then lunges forward to bite Cal. Easily avoided but hits brutally hard if landed.
Counter Strategy: Dodge the attack then strike back once. Don‘t get greedy!
Belly Flop
Attack Telegraphs: The Spawn‘s body glows red as it leaps upward into a belly flop.
Counter Strategy: This attack is unblockable! Use Force Slow just before impact or quickly dodge away.
Lunge
Attack Telegraphs: An unblockable attack where the Spawn charges rapidly towards Cal.
Counter Strategy: Jump over the creature as it passes beneath or redirect it with Force Push.
Acid Spit
Attack Telegraphs: The Spawn rears back and spits a glob of damaging acid.
Counter Strategy: Dodge away then move behind cover to avoid the acid pool. Use Force Slow to halt the projectile.
Aggressive Combo
Attack Telegraphs: A rapid series of lethal bites mixed with acid globs.
Counter Strategy: Precise dodging is essential here – don‘t try blocking! Wait for combo to end before counterstriking.
Tongue Grab
Attack Telegraphs: An instant death attack where the Spawn ensnares Cal with its tongue.
Counter Strategy: Dodge left or right the moment you see red telegraphing. If snared, mash inputs to break free!
Leaping Slam
Attack Telegraphs: The Spawn‘s ultimate move sees it leaping into the ceiling before crashing down.
Counter Strategy: Use Force Slow to halt its descent, then dodge away. Takes huge damage if hit.
Master these counters and you‘ll be well on your way to triumphing over the Spawn‘s trial by combat. Now let‘s discuss strategies for surviving this onslaught.
Tips and Tactics for Defeating the Spawn of Oggdo
Simply weathering the Spawn‘s fierce attacks isn‘t enough – you‘ll need to strategically whittle down its health. Based on countless battles against this monster, here are my top tips for coming out on top:
Patience is Key
The Spawn has a massive health bar – don‘t get impatient trying to rush it down. Focus only on landing a few clean hits between its combo chains before repositioning.
Attack Only When It‘s Safe
Greed will get you killed fast here. Resist overextending combos – strike only when you know the Spawn is recovering from an attack.
Keep Your Distance
Don‘t get trapped in close quarters with this beast! Use hit and run tactics to better react to its moves. Many attacks can‘t hit at range.
Ability Usage Wins Fights
Proper timing of Force Slow and Force Push can completely shut down the Spawn‘s offense. Save Valor Surge: Temperance to escape dire situations.
Heal Frequently
Find safe windows to heal with stims – it‘s impossible to fully dodge every attack here. Upgraded stim efficiency helps counter drain.
The Trill of Overcoming a Worthy Adversary
After an intense battle, it‘s an incredible feeling to finally watch the Spawn of Oggdo shudder and collapse before you. The beast fades back into the Force, unable to withstand your Jedi mastery. As its health bar ticks to zero, a heady rush of victory and vindication floods your senses.
In my many years adventuring through virtual worlds, conquering the Spawn remains one of my proudest feats. The journey to dethrone Fort Kah‘Lin‘s tyrant king tested every ounce of my Jedi skill and determination. But besting this legendary foe also forged me into a stronger warrior. With the creature slain, I added new devastating powers like Force Slow Tier 2 to my arsenal.
Of course, the true joy lies not just in gaining new abilities, but overcoming a challenge that once seemed insurmountable. To any Jedi braving Koboh‘s dangers, I can promise this: stay steadfast in your training, learn the Spawn‘s moveset, and you too shall emerge triumphant from this acid-filled arena. The frog king‘s reign ends today!
Claiming Your Reward
A throne room always hides treasure for those bold enough to seize it! By slaying the Spawn of Oggdo, you gain access to a brightly glowing chest tucked away in its lair. Open this to obtain an exclusive equipment piece – the Fort Kah‘Lin poncho.
This stylish poncho perfectly complements the ragged coveralls you‘ve sported since escaping the First Order. Its muted tones and practical fabrics suit a rising Jedi survivor. Admire your trophy once you equip it at a workbench. You‘ve earned a badge of honor by conquering one of Survivor‘s fiercest creatures!
You‘ll also gain a valuable Priorite shard from a locked crate deeper in the Spawn‘s tunnels for upgrading your lightsaber. With new gear in hand and deadly Force powers unlocked, Cal‘s quest on Koboh continues ever stronger!
Parting Words Before Venturing Onward
I hope this guide has thoroughly prepared you to confront the Spawn of Oggdo with courage and tactical foresight. While this monstrosity still haunts my nightmares, I now know every subtle tell preceding its attacks. Put my hard-won lessons into practice as you delve into Jedi: Survivor‘s depths. If I can topple that giant frog, any Jedi with enough patience and skill can!
With the Spawn slain and looted, the mysteries of Koboh beckon. What other imposing creatures skulk in the shadows? What revelations lie buried under years of secrecy and Imperial decay? I for one can‘t wait to discover the answers across my next playthrough. This survivor‘s journey has only just begun…
May the Force be with you, brave Jedi! Go forward and fear no evil – not even colossal frog kings.