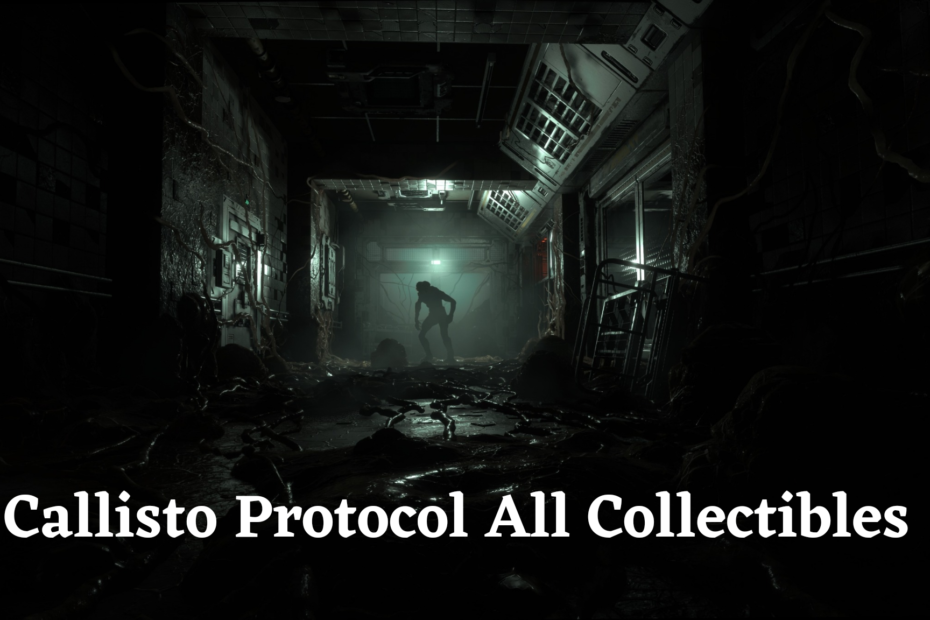
The Callisto Protocol is the latest survival horror game developed by Striking Distance Studios and published by Krafton. Set in the year 2320 on Jupiter‘s moon Callisto, you play as Jacob Lee, a prisoner who must escape from Black Iron Prison while battling mutated monsters.
One of the key extras in the game are collectibles. Finding all 43 collectibles in The Callisto Protocol is no easy feat, but it helps piece together more of the backstory. This guide will breakdown where to find every single collectible in The Callisto Protocol.
Overview of Collectibles
There are 43 total collectibles divided into two categories:
- Data Bios: Provide background information on various characters. There are 20 Data Bios to find.
- Implant Bios: Give further insight into the experiments and research happening on Callisto. There are 23 Implant Bios in the game.
The collectibles are spread across the game‘s 8 chapters. Most are found on or near corpses or hidden in the environment. Finding them all requires thorough exploration.
Now let‘s dive into each chapter and document the locations of all the collectibles!
Chapter 1: Cargo (1 Collectible)
Right at the start of the game, there is 1 collectible to find in Chapter 1: Cargo.
Prisoner Transfer Log
After the initial cutscene, walk forward through the corridor. When you reach the end, turn left. There is a console here that you can interact with to collect the Prisoner Transfer Log audio log.
This log confirms Jacob Lee‘s prisoner identity and that he is being transferred to the maximum security area of Black Iron Prison. It also indicates that the facility suffers from frequent power outages.
Chapter 2: Outbreak (3 Collectibles)
Chapter 2 ramps up the action quickly and has 3 collectibles for you to locate.
Dr. Caitlyn Mahler‘s Recording
At the start of the chapter, walk forward avoiding the malfunctioning security robot ahead. Go down the left path and continue until you reach the weapons lockup room.
Inside this room, go to the back left corner. There is a locked door here listed as “Surgery M112”. Interact with the fuse box to the right of this door to collect Dr. Caitlyn Mahler‘s Surgery Recording audio log.
In the log, Dr. Mahler talks about an unprecedented mutation event occurring within a patient named Elias Casteel.
Elias Casteel‘s Testament
After collecting Dr. Mahler‘s log, continue forward battling enemies. Eventually you will reach an outdoor area overlooking a watchtower. Take down the 4 enemies here then drop down to the lower level.
On this level there is a holding cell secured by chainlink fences. Inside, on one of the tables, you can grab Elias Casteel‘s Testament audio log.
In his final testimony, Elias apologizes to his wife and child, indicating he volunteered for experiments to get his family off Callisto.
Captain Leon Ferris‘ Final Words
At the end of the chapter you will come across a cutscene where Captain Ferris unsuccessfully battles mutated monsters. After this, walk forward into the next room.
On the central holotable you can collect Captain Leon Ferris‘ Final Words audio log, where he accepts blame for the catastrophe that has befallen Callisto.
Chapter 3: Aftermath (8 Collectibles)
Chapter 3 contains 8 collectibles to obtain, all of which are Data Bios.
Sgt. Erica Jane
Starting the chapter, you need to unlock a security door by harvesting 2 Data Bios. Turn around to where you begin and there is a dead body facing right next to a malfunctioning robot and some crates. Interact with this corpse to obtain Sgt. Erica Jane’s Data Bio.
Officer Pruitt Matos
After unlocking the door, continue forward until you reach the prison laundry room. Pass through this room and enter the door connecting to the corridors beyond.
Take your first right and enter office B112 on the left side. Inside this office is the corpse of Officer Pruitt Matos. Harvesting his body will provide the 2nd Data Bio needed to unlock the door.
Duncan Cole
With the door now open, press onward battling more enemies. You eventually reach the upper level of the laundry room which contains some locked doors.
Take the left path into a small room with an open vent at the top. Crawl through and drop down the shaft, then go down the stairs on the right. Below is a secret monitoring room with multiple consoles.
Check the central table to discover the remains of Duncan Cole. Acquiring his Data Bio also completes an optional mission.
Dr. Ewan Hayes
Next make your way back upstairs via the ladders and go towards the rear of the medical ward hallway marked C101. At the end near the exit you can harvest a dead doctor named Dr. Ewan Hayes.
Officer Dax Symmons
Continuing forward, you will reach the atrium area labeled C110 near the ceiling. Look on the upper level to spot a chained corpse dangling. Shoot it down then grab Officer Dax Symmons’ Data Bio on the floor below.
Kerry Brown
Take the elevator down to the basement. As you walk forward toward the spinning fan, check the right side path to discover Kerry Brown’s remains which contain another Data Bio.
Tadgh Song
After passing through the fan section and restore power, ride the service lift up. Vault over the crates ahead and leap across the gap to reach a platform with the corpse of Tadgh Song. Harvesting him completes all Data Bios for Chapter 3.
Dani Nakamura
The final collectible in this chapter is from Dani Nakamura after she captures you. When she throws you in an isolation cell, look right to find a console by the beds which unlocks Dani‘s Data Bio.
Chapter 4: Habitat (7 Collectibles)
Prepare for a challenging chapter as you escape the Habitat dome battling the UC01 mutants. There are also 7 collectibles spread throughout the area.
Dr. Caitlyn Mahler‘s Research Log
Early on you have to pass through the waste disposal pipes. After squeezing through a narrow vent, climb the crates on the left. On top of one stack is Dr. Mahler‘s Research Log audio recording.
In the log, Mahler expresses regret and guilt for her role in creating the mutants by pushing the botanical research too far.
Officer Bruno Vorenus
Further ahead you will reach the H207 airlock. Before going upstairs, check the ground floor hallway to the right to find a body. It belongs to Officer Bruno Vorenus. Acquire his Implant Bio here.
Dr. Jae Moon-Bell
After battling mutants on the catwalks, you need to head downstairs and restore the power. Throw the lever and enter the now opened hallway. Halfway down on the right is the corpse of Dr. Jae Moon-Bell along with her Implant Bio.
Officer James Reese
Continuing forward you will discover the mutants can infect and morph human bodies, even turning Officer Reese against you! Once you put him down, get Reese’s Implant Bio from his transformed corpse.
Sgt. Bill Pekelo
In the next section you have to brave underwater pipes and also deal with zero gravity. After returning to normal operations, look in the nearby water on the left to spot the dead body of Sgt. Bill Pekelo. Retrieve his Data Bio here.
Officer James Reese‘s Log
Press the only operational elevator button to descend deeper into the facility. Exit into Habitat Wing 6 and head through the room number 631. Inside on one of the crates is the Security Log audio recording left behind by Officer James Reese before his horrific transformation.
Officer Kyle Serra‘s Log
In the final stretch of the chapter you gain access to Wing 6 south. Walk down the hall and enter Wing 621. Check the back right corner, up on some containers, to obtain Officer Kyle Serra‘s Evacuation Log.
With Serra’s log acquired, that wraps up all collectibles to find in Chapter 4!
Chapter 5: Lost (8 Collectibles)
Venturing out across Callisto‘s icy surface, Chapter 5 holds 8 collectibles spread around the environment.
Miranda Kristofich‘s Log
At the start, head through the malfunctioning gate. Enter the first building on the left which contains lockers and computer terminals. Check the right wall shelf to discover Miranda Kristofich‘s Terraforming Log.
This log hints at problems with Callisto‘s terraforming process being rushed before the surface was truly habitable for humans.
Richard Kidd
After battling foes outside proceed toward the facility entrance up ahead guarded by turrets. Take cover and destroy the turret or sprint past toward a rocky area on the right. Behind one of the big rocks lies the corpse of Richard Kidd. Download his Data Bio here.
Dr. Caitlyn Mahler‘s Research Notes
Moving forward into the mine tunnels, you will need to crouch through a hole blasted in the wall on the left side. Just past the hole resting on some crates is an audio log from Dr. Mahler titled Research Notes: Combustors.
This log provides more disturbing details on Mahler’s experiments which involved grafting plant cells onto humans to observe mutation effects.
Lt. Devon Wayne
Continuing deeper through the frozen mine you will encounter Dani again. After your rendezvous go upstairs where a battle occurs in the bridge control room. On the lower level behind the desks lies Lt. Devon Wayne’s corpse along with his Data Bio.
Officer Aaron Taycho
Press the button to open the door leading into the power station. Follow the linear path until you reach the room marked “Prisoner Transfer Center”. Inside on the floor is Officer Aaron Taycho’s remains which hold another Data Bio.
Max Barrow‘s Testimony
Keep pushing forward battling more foes until you discover the wreckage of a drop ship. Check inside the second compartment area to locate an audio testimony from Max Barrow regarding unauthorized mining incidents and safety protocol breaches by Black Iron leadership.
Sgt. Scott Dvitny
The last collectible here can be found inside the mine hangar. Look right to spot a rover vehicle. Get close to harvest the Data Bio off Sgt. Scott Dvitny‘s corpse positioned underneath.
Chapter 6: Below (5 Collectibles)
Underground dangers await in Chapter 6 along with 5 more collectibles to track down.
Dr. Sheehan Yune‘s Research Log #1
At the start of this chapter, take down the first enemy then look for an open door on the right side of the cavern. Enter the small office space within and check the workbench straight ahead to collect Dr. Sheehan Yune‘s Research Log #1.
This audio recording indicates Dr. Yune was studying the effects of radiation on organic tissue which likely ties into the mutating experiments.
Dr. Sheehan Yune‘s Research Log #2
Further into the twisting mining tunnels there is a large spiraling path leading down with multiple pale mutant enemies lurking. At the bottom of the ramp on the right wall is Dr. Yune’s Research Log #2.
Dr. Sheehan Yune
Continuing forward you need to crawl through wreckage to reach the next cavern area. Take the first right once inside toward a narrow tunnel in the rock. Follow this and you will discover Yune‘s corpse itself on the ground. Download Dr. Sheehan Yune‘s Data Bio here.
Yannick Sage
The next section requires getting the power back online. Along the way watch out for groups of suicidal enemy mutants rushing your position! Restore the power then ride the lift up. Exit out and enter the now powered door to an office on the right.
Check the central console table to find Yannick Sage‘s remains. Download his personal Data Bio for more background on this Black Iron guard.
Arden Jeddha
Toward the end of the chapter, proceed forward to reach the Arcas Facility. As you descend down, look right to spot a dead scientist named Arden Jeddha. Grab his Data Bio before moving into the abandoned site.
Chapter 7: Colony (7 Collectibles)
Prepare to battle through the mining colony and discover 7 collectibles along the way in Chapter 7.
Alex Wang
At the start head downstairs toward the locked gate. Check the left side hallway to find Alex Wang‘s corpse. Harvest the Data Bio here to obtain Alex‘s heartbreaking final Miner‘s Log sent to his sister.
Derryn Barr – Miner‘s Log #2
After encountering Dani, climb the stairs in the next hallway. Enter the room straight ahead near the Administrator label to discover Derryn Barr‘s 2nd Miner‘s Log on one of the shelves.
In this log, Derryn expresses frustration with the failing terraforming process as well as distrust toward the UJC corporation.
Derryn Barr – Miner‘s Log #3
Keep battling through the facility until you reach the tower lines. Ride the lift up to the control room. Check inside near the console to find Derryn Barr‘s corpse and acquire his 3rd Miner‘s Log.
Yannick Sage
Take the nearby elevator up to the habitation level. Exit and turn right to encounter Dani again. This time however she executes a miner. Check the dead body by the doorway to harvest Yannick Sage‘s Data Bio.
Buidhe Reddwork
Ascend the staircase to living quarters 2F. Follow the linear path to apartment units then head up the stairs again to the 3F level. Take your first right into a ransacked apartment to find Buidhe Reddwork‘s remains which provide another Data Bio.
Ji-Kwan Park
Keep moving forward along the rooftop toward the exit. Before dropping down, enter the building straight ahead. Inside the control room lies the corpse of Ji-Kwan Park. Acquire his 4th and final Miner‘s Log Data Bio here.
Duncan Cole
The last collectible is earned after defeating UJC chief of operations Elijah Snow. After the boss fight concludes, look right near the closed security door to spot a small console table with a lamp. Interact with this to obtain fugitive Duncan Cole‘s Data Bio log, wrapping up Chapter 7!
Chapter 8: Tower (4 Collectibles)
The final chapter set in the towering zenith of Black Iron prison holds 4 last collectibles to obtain.
Dr. Tala Ismene #1
At the start head through the yellow door into the waste disposal area. Pass through the linear corridors and enter the server room on the right. Flip the switch to open the door and exit back out to the hall.
Follow the path until you reach the malfunctioning incinerator room. Check the table straight ahead to find Dr. Tala Ismene‘s Research Log #1.
Dr. Tala Ismene #2
After acquiring Ismene‘s first log continue onward up the stairs to the floor above. Peer down the hallway to the left and spot the viewing room marked Psych A140. Crouch through the half-open duct above to drop inside this room.
Grab Dr. Tala Ismene‘s Research Log #2 off the nearby table to learn more about her obsession with studying the Biophage infection.
Edward Bates
Press the red button to exit the viewing room and return to the hallway. Pass through the next corridor section and laboratory. Proceed upstairs until Dr. Mahler directs you into a sealed experimentation room.
Once inside check the medical station console on the right to find Edward Bates’ Data Bio. Bates was the first failed test subject for Dr. Mahler’s mutation experiments.
Duncan Cole
Getting closer to the climax, ride the elevator up to the maximum security level. Follow the linear path taking out enemies along the way. Eventually you will enter a large chamber-like room.
On the desk straight ahead lies the 6th and final Data Bio from none other than Duncan Cole. With Cole‘s Bio in hand, you‘ve found every collectible in The Callisto Protocol!
Closing Thoughts on Finding All Collectibles
Completing The Callisto Protocol along with locating all 43 collectibles is an immensely satisfying achievement. I hope this guide detailing the exact location of every Data Bio and Implant Bio has helped you secure them all!
Let me know which collectible was your favorite or provided the most interesting lore revelations on the events transpiring in Black Iron Prison. Personally, I found Dr. Mahler’s various research logs quite disturbing yet informative on how the outbreak truly started. Duncan Cole’s story arc also proved intriguing with his multiple bios appearing across different chapters.
Thanks so much for reading! Feel free to check out my other Callisto Protocol guides here on the best weapons, boss fight tips, and ending explained. I’ll see you next time!