In today's digital-first retail landscape, the power of visual content cannot be overstated. When it comes to selling shoes online, compelling photography isn't just a nice-to-have—it's essential. This comprehensive guide will walk you through the art and science of shoe photography, helping you create images that not only showcase your products but also drive conversions and build brand loyalty.
The Impact of High-Quality Shoe Photography
Before diving into the technical aspects, let's consider why investing in professional-grade shoe photography is crucial:
- First Impressions Matter: In e-commerce, your product images are often the first and sometimes only impression potential customers have of your footwear.
- Increased Engagement: High-quality visuals can significantly boost customer engagement and time spent on your product pages.
- Higher Conversion Rates: Detailed, attractive images instill confidence in potential buyers, leading to improved conversion rates.
- Reduced Returns: Accurately representing your products through photography can lower return rates, saving you money and improving customer satisfaction.
- Enhanced Brand Image: Professional product photography elevates your brand's perceived value and overall image.
According to a study by Etsy, 90% of online shoppers say photo quality is the most important factor in their decision to purchase. For shoe retailers, this statistic underscores the critical role of photography in driving sales.
Preparing for the Perfect Shot
Shoe Preparation
Before you even think about picking up your camera, ensure your shoes are in pristine condition:
- Remove any tags, stickers, or price labels
- Clean the shoes thoroughly, paying special attention to soles and laces
- Stuff shoes with tissue paper to maintain shape (especially important for boots and high-top sneakers)
- For strappy shoes or sandals, use clear plastic supports to showcase their structure
Pro Tip: For leather shoes, consider using a leather conditioner to enhance their appearance and bring out the natural luster of the material.
Choosing the Right Background
Your choice of background can make or break your shoe photographs. Consider these options:
- White Background: A classic choice that keeps the focus on the product. Ideal for e-commerce platforms that require consistent, clean imagery.
- Contextual Backgrounds: Perfect for lifestyle shots that show the shoes in their intended environment. For example, photographing running shoes on a track or dress shoes in an office setting.
- Colored or Textured Backgrounds: Can complement or contrast with the shoe colors, adding visual interest. Be cautious not to overwhelm the product itself.
A study by BigCommerce found that 67% of consumers consider image quality "very important" when making purchase decisions online. Maintaining consistency in your background choices across your product line can contribute to a cohesive, professional look that builds trust with potential buyers.
Mastering Lighting Techniques
Lighting is perhaps the most critical element in shoe photography. Poor lighting can obscure details, distort colors, and create unflattering shadows.
Natural Light
- Ideal for lifestyle shots or outdoor settings
- Shoot during the "golden hour" (just after sunrise or before sunset) for warm, flattering light
- Use diffusers to soften harsh sunlight and reduce shadows
Studio Lighting
For consistent, controllable results, set up a three-point lighting system:
- Key light: Your main light source, typically positioned at a 45-degree angle to the subject
- Fill light: Softens shadows created by the key light, placed opposite the key light
- Backlight: Separates the shoe from the background, adding depth and dimension
Flash Photography
- Can create dramatic effects and highlight specific features
- Requires practice to avoid harsh shadows or overexposure
- Consider using off-camera flash for more control and creative possibilities
Pro Tip: Different shoe materials react differently to light. Experiment with lighting angles to best showcase textures like leather, suede, or patent finishes. For instance, a slight side lighting can bring out the texture of suede, while a more direct light might be better for showcasing the shine of patent leather.
Essential Equipment for Shoe Photography
While it's possible to take decent shoe photos with a smartphone, professional-grade results typically require specialized equipment:
Cameras
- DSLR or Mirrorless Cameras: Offer superior image quality and control
- Popular brands: Canon, Nikon, Sony, Fujifilm
- Look for cameras with high resolution (20MP+) and good low-light performance
Lenses
- Prime lenses (50mm to 100mm) are ideal for shoe photography, offering sharp focus and minimal distortion
- Macro lenses for detailed shots of textures and small features
- A 24-70mm zoom lens can be versatile for both product and lifestyle shots
Tripods
- Essential for maintaining consistency across shots
- Allows for longer exposures in low-light situations
- Look for sturdy tripods with adjustable height and a ball head for easy positioning
Additional Equipment
- Light boxes or softboxes for diffused, even lighting
- Reflectors and diffusers for manipulating natural light
- Color calibration tools to ensure accurate color representation
Camera Settings for Optimal Results
Understanding and mastering your camera's settings is crucial for achieving the best results in shoe photography:
- Aperture: Use a higher f-stop (f/8 to f/11) to keep the entire shoe in focus. This ensures that both the toe and heel are sharp in your images.
- ISO: Keep it low (100-400) to minimize noise, especially in studio settings. Higher ISO may be necessary in low-light conditions but can introduce graininess to your images.
- Shutter Speed: Adjust based on your lighting conditions, typically 1/60 to 1/200 for handheld shots. If using a tripod, you can use slower shutter speeds without risking blur.
- White Balance: Set manually or use a gray card to ensure accurate color representation. This is especially important when shooting shoes of various colors.
Composition Techniques for Compelling Shoe Photos
Essential Angles
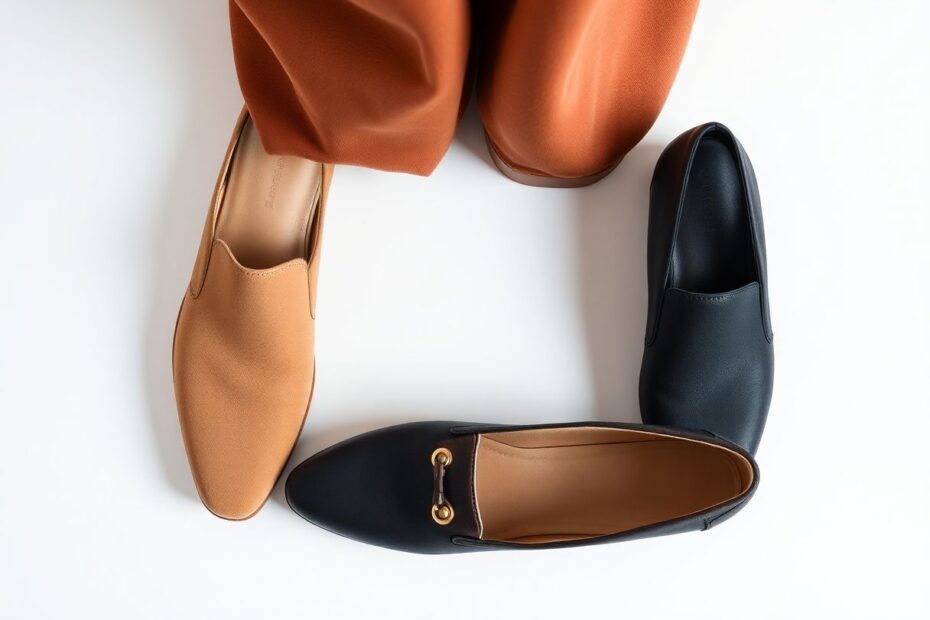
To give customers a comprehensive view of your shoes, include these key angles:
- Front view
- Side profile (both left and right)
- Top-down view
- Back view (especially important for heels or shoes with unique back designs)
- 45-degree angle shot
- Detail shots of unique features or materials
Creative Compositions
- Use the rule of thirds to create visually appealing images
- Experiment with negative space to draw attention to the shoes
- Consider lifestyle shots that show the shoes in action or in contextually relevant settings
A study by Shopify found that products with multiple high-quality images from various angles can increase conversion rates by up to 58%.
Styling and Props: Elevating Your Shoe Photography
Thoughtful styling can transform your shoe photography from good to great:
- Use props that complement the style of the shoe (e.g., a beach backdrop for sandals, urban settings for streetwear)
- Include accessories that might be worn with the shoes (e.g., socks, jewelry, or a handbag)
- For athletic shoes, incorporate relevant sports equipment or action shots
Remember: Props should enhance, not distract from, the main subject—the shoes. A study by Nielsen Norman Group found that users pay close attention to images that show products in context, as it helps them envision how they might use the item.
Advanced Techniques for Professional Results
Focus Stacking
For ultra-sharp images from toe to heel:
- Take multiple shots, focusing on different parts of the shoe
- Use software like Adobe Photoshop or Helicon Focus to combine these images
- This technique ensures every part of the shoe is in crisp focus, which is particularly useful for shoes with intricate details
360-Degree Photography
- Gives customers a complete view of the product
- Can be achieved with specialized turntable equipment or by taking multiple shots and combining them in post-processing
- According to Shopify, 360-degree product photos can increase conversion rates by up to 30% compared to traditional static images
Post-Processing: Perfecting Your Shoe Images
Even the best raw shots can benefit from some post-processing:
- Adjust exposure and contrast to ensure the shoe is well-lit and details are visible
- Fine-tune colors to match the actual product, using color calibration tools if necessary
- Remove any imperfections or distractions in the background
- Crop and resize images for consistency across your product line
Popular software options include:
- Adobe Lightroom: Excellent for batch processing and color correction
- Capture One: Favored by many professional product photographers for its color accuracy
- GIMP or Canva: Budget-friendly options for basic editing needs
Optimizing Shoe Photography for E-Commerce Success
To ensure your beautiful shoe photos translate to sales:
- Optimize file sizes for fast loading without sacrificing quality. According to Google, 53% of mobile site visits are abandoned if pages take longer than 3 seconds to load.
- Use descriptive file names and alt text for SEO benefits. This helps your images appear in image search results, potentially driving more traffic to your product pages.
- Ensure your images are mobile-responsive, as a growing percentage of online shopping is done on smartphones and tablets.
Emerging Trends in Shoe Photography
As we look towards the future, keep an eye on these emerging trends:
- Augmented Reality (AR) Try-On Experiences: Allowing customers to virtually "try on" shoes using their smartphones. Brands like Nike and Gucci have already implemented this technology.
- Video Content: Short, engaging videos showcasing shoes in motion or highlighting key features. According to Wyzowl, 84% of people say they've been convinced to buy a product or service by watching a brand's video.
- Sustainable and Eco-Friendly Themed Shoots: As consumers become more environmentally conscious, showcasing shoes in natural settings or highlighting sustainable materials can resonate with eco-minded shoppers.
- User-Generated Content Integration: Incorporating real customer photos can increase authenticity and trust. Studies show that user-generated content can increase conversion rates by up to 161%.
Conclusion: Stepping Up Your Shoe Photography Game
Mastering shoe photography is an ongoing process of learning, experimentation, and refinement. By focusing on preparation, technique, and post-processing, you can create images that not only showcase your products in their best light but also connect with your audience on an emotional level.
Remember, great shoe photography isn't just about selling a product—it's about telling a story, evoking a feeling, and inviting the viewer to imagine themselves wearing those shoes. With practice and attention to detail, your shoe photography can become a powerful tool in your marketing arsenal, driving engagement, sales, and brand loyalty.
As you embark on your shoe photography journey, keep these key takeaways in mind:
- Invest in quality equipment and learn to use it effectively
- Pay meticulous attention to preparation and styling
- Master lighting techniques to showcase your shoes' best features
- Experiment with composition and angles to create compelling images
- Stay current with trends and technologies in product photography
By implementing these strategies and continuously refining your approach, you'll be well on your way to creating shoe photography that not only catches the eye but also converts browsers into buyers. So, grab your camera, set up your studio, and start capturing those shoes in all their glory. Your customers—and your bottom line—will thank you for it.