In today's visually-driven online marketplace, stunning product photography can make or break your e-commerce business. High-quality images not only showcase your products in their best light but also build trust with potential customers and significantly boost conversions. While professional photography services can be expensive, this comprehensive guide will equip you with the knowledge, techniques, and insider tips to create beautiful product photos on your own, elevating your brand and driving sales.
Essential Equipment for DIY Product Photography
The Camera: Your Most Important Tool
While professional DSLRs can produce amazing results, you don't need to break the bank to get started. Here's what you need to know about choosing the right camera:
Smartphone cameras: Modern smartphones are capable of taking excellent product photos. They're a great starting point for beginners and can produce professional-looking results with the right techniques. The latest iPhone and Samsung Galaxy models offer advanced features like portrait mode and manual controls.
Entry-level DSLRs: If you're ready to invest, consider an affordable DSLR like the Canon Rebel series or Nikon D3500. These cameras offer excellent image quality, interchangeable lenses, and full manual control.
Mirrorless cameras: These offer DSLR-quality images in a more compact form factor. Options like the Sony Alpha series or Fujifilm X-T series are popular among product photographers for their portability and high-quality output.
Key tip: Whatever camera you choose, learn its manual settings to have full control over your images. Understanding aperture, shutter speed, and ISO is crucial for achieving professional results.
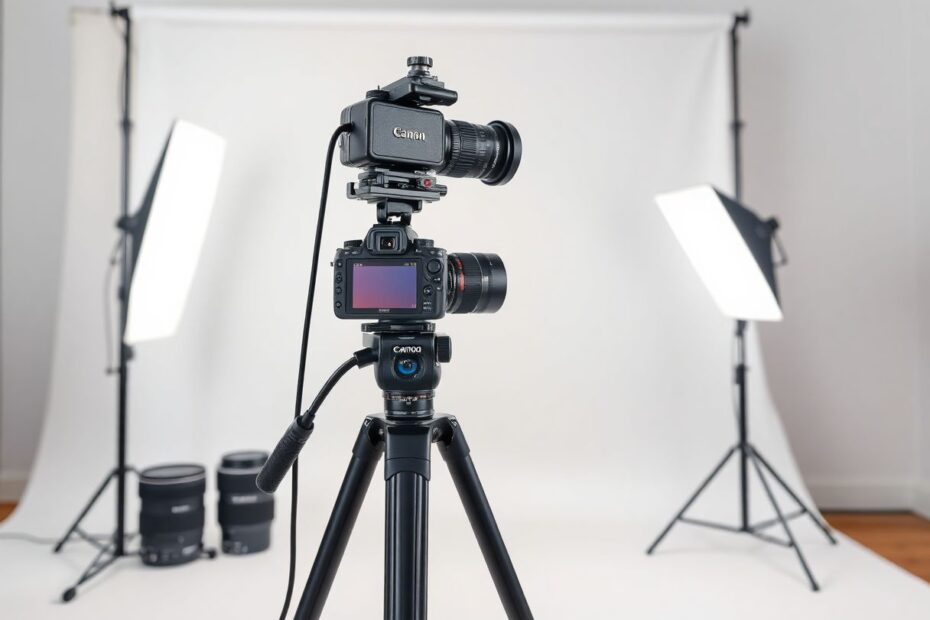
Tripod: Stability is Key
A sturdy tripod is essential for sharp, consistent product photos. Benefits include:
- Eliminates camera shake, especially important for longer exposures
- Maintains consistent framing across multiple shots, crucial for creating cohesive product collections
- Allows for longer exposures in low-light conditions, expanding your shooting options
When selecting a tripod, look for one that's:
- Stable enough to support your camera without wobbling
- Adjustable in height to accommodate various product sizes and angles
- Compatible with your camera's mount
- Portable enough for your workspace
Recommended options include the Manfrotto MT190XPRO4 for DSLRs or the Joby GorillaPod for smartphones and lighter cameras.
Lighting: Natural vs. Artificial
Lighting can make or break your product photos. Let's explore your options in more detail:
Natural light:
- Pros: Free, soft, and flattering; creates a warm, inviting atmosphere
- Cons: Inconsistent throughout the day; weather-dependent
- Best for: Beginners, lifestyle product shots, organic or handmade items
- Tips: Shoot near a large north-facing window for soft, diffused light; use early morning or late afternoon light for a warm glow
Artificial light:
- Pros: Consistent regardless of time or weather; fully controllable
- Cons: Requires initial investment; learning curve to master
- Best for: Consistent product catalogs, shooting at any time, technical or highly detailed products
- Options:
- Continuous LED lights: Provide constant illumination, making it easier to see the effect of lighting changes in real-time
- Strobes or flash: Offer more power and faster recycle times, ideal for freezing motion or shooting reflective products
Pro tip: Start with natural light near a large window, then gradually introduce artificial lighting as you gain experience. A combination of natural and artificial light can often yield the best results.
Backdrop: Creating a Clean Canvas
A simple, clean backdrop makes your products pop and creates a professional look. Options include:
Sweep: A curved background that transitions seamlessly from vertical to horizontal, eliminating the horizon line. You can create a DIY sweep using large sheets of paper or invest in a collapsible backdrop system.
Lightbox: An all-in-one solution for small products, providing even illumination and a clean background. The Amazon Basics Portable Photo Studio is an affordable option for beginners.
Seamless paper: Available in various colors and easily replaceable. Savage Universal makes high-quality seamless paper in a wide range of colors.
White is the most versatile color for product photography, but don't be afraid to experiment with other colors that complement your products. Light gray or pale pastels can add subtle interest without overpowering the subject.
Setting Up Your DIY Photography Studio
Choosing the Perfect Location
Find a space in your home or office with:
- Ample natural light (if using)
- Enough room for your equipment and to move around comfortably
- Minimal distractions and clutter
- Access to power outlets for artificial lighting and charging equipment
Consider dedicating a specific area to your product photography to maintain consistency and streamline your workflow.
Creating Your Shooting Table
A stable, clean surface is crucial for professional-looking product photos. Consider:
- A sturdy folding table that can be easily stored when not in use
- A dedicated desk or workbench for a more permanent setup
- DIY option: A piece of plywood on sawhorses for a customizable, budget-friendly solution
Cover your surface with your chosen backdrop material for a seamless look. Use clamps or tape to secure the backdrop and prevent wrinkles or shifts during shooting.
Lighting Setup
For natural light:
- Position your table near a large window, ideally north-facing for consistent, diffused light
- Use white foam board or reflectors to bounce light back onto the product and fill shadows
- Consider using a sheer curtain or diffuser to soften harsh direct sunlight
For artificial light:
- Invest in softboxes or LED panels for soft, even illumination. The Neewer 660 LED Panel is a versatile and affordable option.
- Position lights at 45-degree angles to your product to create dimension and minimize shadows
- Use diffusers to soften harsh shadows and create a more natural look
- Experiment with a two or three-light setup for more control over highlights and shadows
Remember, the key to great lighting is experimentation. Take test shots and adjust your setup until you achieve the desired look.
Mastering Camera Settings for Product Photography
Understanding Exposure
The exposure triangle consists of three key elements:
- Aperture: Controls depth of field (how much of the image is in focus)
- Shutter speed: Affects motion blur and the amount of light reaching the sensor
- ISO: Determines light sensitivity, with higher values introducing more noise
For product photography, aim for:
- Small aperture (high f-number, like f/8 to f/11) for maximum depth of field, ensuring the entire product is in focus
- Low ISO (100-400) to minimize noise and maintain image quality
- Adjust shutter speed as needed for proper exposure, typically 1/60 to 1/200 second for stationary products
Use your camera's histogram to ensure proper exposure, aiming for a balanced distribution of tones without clipping highlights or shadows.
White Balance
Proper white balance ensures accurate colors in your photos, which is crucial for product representation:
- Use the "Auto" setting as a starting point, but be prepared to adjust
- For more control, use a gray card to set a custom white balance
- Shoot in RAW format for maximum flexibility in post-processing, allowing you to adjust white balance without loss of quality
Consider investing in a color checker card, like the X-Rite ColorChecker Passport, for precise color accuracy across your entire product line.
Focus
Sharp focus is critical for product photos, showcasing details and quality:
- Use manual focus for precise control, especially for small products or intricate details
- Enable your camera's "live view" mode to zoom in and check focus at 100%
- Consider focus stacking for products with intricate details or a large depth of field
When using autofocus, select a single focus point and place it on the most important part of the product.
Composition Techniques for Compelling Product Photos
Rule of Thirds
Divide your frame into a 3×3 grid and place key elements along the lines or at intersections for a balanced composition. This technique adds visual interest and draws the viewer's eye to important product features.
Negative Space
Use empty space around your product to create a clean, minimalist look that draws attention to the item. This technique is particularly effective for luxury products or when you want to convey a sense of simplicity and elegance.
Angles and Perspectives
Experiment with different angles to showcase your product's best features:
- Eye-level for a straightforward view, ideal for most product catalog shots
- Bird's-eye view for flat lay compositions, perfect for clothing, accessories, or product collections
- Low angles to create a sense of power or importance, effective for technology products or large items
Don't be afraid to get creative with your angles – sometimes an unexpected perspective can make your product stand out from the competition.
Post-Processing: Elevating Your Product Photos
Essential Editing Steps
Adjust exposure and contrast: Brighten shadows and enhance highlights to create a balanced image that accurately represents your product.
Color correction: Ensure accurate product colors by adjusting white balance and individual color channels if necessary.
Remove blemishes or distractions: Use healing and cloning tools to clean up imperfections in the product or background.
Crop and straighten: Fine-tune composition and ensure your product is perfectly aligned.
Sharpen: Enhance details, but be careful not to overdo it – aim for natural-looking sharpness.
Software Options
Adobe Lightroom and Photoshop: Industry standards with powerful tools for both RAW processing and detailed retouching.
Capture One: Popular among professional product photographers for its excellent color handling and tethered shooting capabilities.
GIMP: A free, open-source alternative with robust features for those on a budget.
Snapseed: An excellent mobile editing app for smartphone photographers, offering professional-level controls in a user-friendly interface.
Whichever software you choose, develop a consistent editing workflow to maintain a cohesive look across your product line.
Advanced Techniques for Stunning Product Photos
Focus Stacking
For products with intricate details or a large depth of field:
- Take multiple shots, focusing on different areas of the product
- Use software like Helicon Focus or Photoshop's auto-blend layers feature to combine images
- Result: Tack-sharp focus throughout the entire product, from front to back
This technique is particularly useful for jewelry, watches, or any product where fine details are crucial.
360-Degree Product Photography
Create interactive product views to give customers a complete understanding of your items:
- Use a turntable to capture images at set intervals (usually every 10-15 degrees)
- Combine images using specialized software like WebRotate 360 or Arqspin
- Embed on your website for an immersive shopping experience
360-degree views can significantly reduce return rates by providing customers with a comprehensive look at the product before purchase.
Lifestyle Product Photography
Showcase your products in context to help customers envision how they fit into their lives:
- Create relatable scenes that tell a story about your product's use and benefits
- Use models or props to demonstrate product use and scale
- Shoot in natural environments that resonate with your target audience
Lifestyle photos can be powerful marketing tools, especially on social media platforms like Instagram.
Optimizing Product Photos for E-commerce Success
File Formats and Sizes
- Use JPEG for most product photos, balancing quality and file size
- Consider PNG for images with transparency or when highest quality is required
- Aim for file sizes under 200KB without sacrificing quality to ensure fast page loading
- Provide high-resolution options for zoom functionality, allowing customers to see fine details
Use tools like TinyPNG or ImageOptim to compress images without noticeable quality loss.
Alt Text and Metadata
- Write descriptive alt text for each product image, improving accessibility and SEO
- Include relevant keywords in file names and metadata to boost search engine visibility
- Ensure your alt text accurately describes the product and its key features
Example: Instead of "red_shirt.jpg", use "mens-cotton-button-down-shirt-red.jpg" for both the file name and alt text.
Multiple Views and Variations
- Showcase products from various angles (front, back, side, detail shots) to provide a complete view
- Include close-ups of important features, textures, or materials
- Display all available color and style options to reduce customer questions and hesitation
Consider creating a consistent shot list for each product type to ensure comprehensive coverage.
Conclusion: Elevate Your Brand with DIY Product Photography
By mastering the art of DIY product photography, you'll not only save money but also gain complete control over your brand's visual identity. With practice and patience, you can create professional-quality images that rival those of larger competitors. Remember, great product photos are an investment in your business's success – they build trust, showcase quality, and ultimately drive sales in the competitive world of e-commerce.
As you continue to refine your skills, don't be afraid to experiment with new techniques and stay updated on the latest trends in product photography. Your unique vision and dedication to quality will set your brand apart and help you create a lasting connection with your customers through the power of compelling visual storytelling.
Keep learning, stay inspired by following professional product photographers on platforms like Instagram or Behance, and most importantly, practice regularly. With time and dedication, you'll develop a distinctive style that perfectly captures the essence of your products and brand, leading to increased customer engagement and sales success.