Capturing stunning images of reflective products can be one of the most challenging yet rewarding aspects of product photography. Whether you're photographing jewelry, glassware, electronics, or any shiny objects, mastering the art of lighting is crucial to creating professional-quality images. In this comprehensive guide, we'll explore how to create eye-catching photos of reflective products using DIY lighting techniques that won't break the bank.
Understanding the Challenges of Reflective Product Photography
Before diving into specific lighting setups, it's important to understand why reflective products are so tricky to photograph:
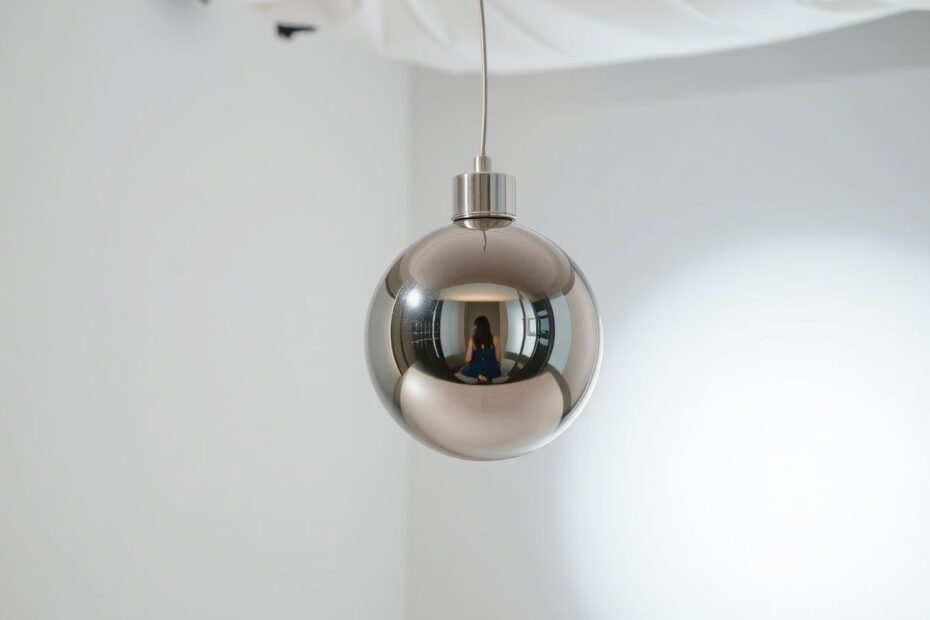
- Unwanted reflections: Shiny surfaces act like mirrors, reflecting everything in their environment – including lights, camera equipment, and the photographer.
- Glare and hotspots: Direct light can create harsh, overexposed areas on the product that obscure details.
- Color casting: Nearby objects can reflect onto the product's surface, altering its true color.
- Loss of detail: Poor lighting can obscure important product features and textures.
- Distortion: Curved reflective surfaces can warp reflections in unpredictable ways.
By addressing these challenges with clever lighting techniques, you can transform your reflective product shots from amateurish to professional.
Essential Equipment for DIY Lighting Setups
To create effective lighting setups on a budget, you'll need:
- A camera (DSLR, mirrorless, or even a smartphone with manual controls)
- A sturdy tripod
- White foam boards or cardboard for reflectors
- Black foam boards for flags (to block light)
- Translucent material (like a white bed sheet) for diffusion
- Clamps or stands to hold materials in place
- Light sources (more on this below)
- A table or raised surface to place products on
- Optional: A light tent or DIY light box
DIY Lighting Sources for Reflective Products
While professional studio lights are ideal, there are several cost-effective alternatives:
Natural light: A large window on a cloudy day can provide soft, even lighting. North-facing windows are often preferred as they offer consistent indirect light.
Desk lamps: Adjustable LED desk lamps offer directional control and are easy to position.
LED panels: Affordable and versatile, these provide even illumination and often have adjustable color temperature.
Flashlights: For precise light placement and dramatic effects. Look for models with adjustable focus.
DIY softboxes: Create your own using cardboard boxes and diffusion material. This allows you to soften and shape the light from harsher sources.
Clamp lights: Inexpensive and highly portable, these can be fitted with various bulbs for different effects.
Ring lights: While primarily used for portraits, ring lights can create interesting circular reflections on shiny objects.
Setting Up Your DIY Studio
Before you start shooting, prepare your workspace:
Clear the area: Remove any unnecessary items that could create unwanted reflections. A clean, minimal space is ideal.
Choose a neutral background: A plain white, black, or gradient backdrop works best for most products. Seamless paper or fabric can create a professional look.
Clean your product: Ensure the item is free of dust, fingerprints, and smudges. Use gloves when handling to avoid new marks.
Set up your camera: Mount it on a tripod for stability and consistent framing. This also allows for longer exposures if needed.
Consider a turntable: For 360-degree product views, a small rotating platform can be invaluable.
Five Pro-Level DIY Lighting Setups for Reflective Products
1. The Tent Technique
This setup is excellent for small to medium-sized reflective objects, providing soft, even illumination from all sides.
What you'll need:
- A large white cardboard box or a photography light tent
- Two or three light sources
- Diffusion material
Setup:
- If using a box, cut out the sides, leaving the bottom and top intact.
- Cover the openings with diffusion material like thin white fabric.
- Place your product inside the box or tent.
- Position lights on either side of the box, aiming through the diffusion material.
- Optional: Add a third light above for top-down illumination.
Pro tip: Adjust the angle of your lights to minimize direct reflections on the product's surface. Experiment with different positions to find the sweet spot for each product.
2. The Gradient Sweep
This technique creates a clean, professional look with a gradual background transition, perfect for showcasing the shape and contours of reflective objects.
What you'll need:
- A large piece of white paper or fabric (at least 3 feet wide)
- Two light sources
- A table or raised surface
- Clamps or tape
Setup:
- Attach the paper to a wall and let it curve down onto the table, creating a seamless backdrop.
- Place your product on the curved portion of the paper.
- Position one light above and behind the product, aiming down the sweep. This creates the gradient effect.
- Place the second light to the side and slightly in front of the product for fill light.
Pro tip: Experiment with the height and angle of the back light to control the gradient's intensity. You can also use black cards on either side of the product to create more defined edges.
3. The Ring of Fire
This dramatic setup is perfect for highly reflective spherical objects like jewelry, watches, or glassware.
What you'll need:
- A ring of white foam board with a hole cut in the center (about 12-18 inches in diameter)
- One powerful light source
- Black foam board for the background
- A small stand or support for the product
Setup:
- Cut a circular hole in the center of the white foam board, about 3-4 inches in diameter.
- Place the product on a raised surface with the black background behind it.
- Position the ring of white foam board around the product, angling it slightly towards the camera.
- Aim your light source through the hole in the foam board, directly at the product.
Pro tip: Adjust the size of the hole to control the amount of light hitting the product directly. A smaller hole creates a more defined ring reflection, while a larger hole provides softer lighting.
4. The Floating Effect
Create the illusion that your product is suspended in mid-air, perfect for jewelry or small tech gadgets.
What you'll need:
- A sheet of clear acrylic or glass (at least 12×12 inches)
- Two light sources
- White foam board reflectors
- Black foam board for the background
- Small supports (like clear acrylic risers) to elevate the sheet
Setup:
- Elevate the acrylic sheet using supports at each corner, about 6-12 inches high.
- Place the black foam board underneath as a background.
- Position your product on the acrylic sheet.
- Set up lights on either side, aiming them at white foam board reflectors to create soft, indirect lighting.
Pro tip: Use a polarizing filter on your camera lens to reduce unwanted reflections from the acrylic surface. Experiment with the angle of the acrylic sheet relative to the camera to control reflections.
5. The Soft Box Simulator
Mimic the effect of professional soft boxes for a clean, evenly lit product shot, ideal for larger reflective items.
What you'll need:
- Two large white foam boards (at least 20×30 inches)
- Two light sources
- Diffusion material
- Clamps or stands to hold the foam boards
Setup:
- Create an "L" shape with the foam boards, forming a corner.
- Place your product in the corner where the boards meet.
- Cover your light sources with diffusion material to soften the light.
- Position the lights outside the foam board setup, aiming them at the boards to bounce light onto the product.
Pro tip: Adjust the angle of the foam boards to control the intensity and direction of the reflected light. You can also add a third foam board on top to create a three-sided light box effect.
Camera Settings for Reflective Product Photography
To capture the best possible images of your reflective products, consider these camera settings:
Aperture: Use a smaller aperture (higher f-number) like f/8 or f/11 for greater depth of field. This ensures the entire product is in focus.
ISO: Keep it low (100-400) to minimize noise and maintain image quality.
Shutter speed: With your camera on a tripod, you can use slower shutter speeds if needed for proper exposure.
White balance: Set manually or use a gray card for accurate color representation. Avoid auto white balance as it can be inconsistent with reflective surfaces.
Focus: Use manual focus to ensure precise sharpness on key product features. Auto-focus can sometimes be fooled by reflections.
File format: Shoot in RAW if possible for maximum flexibility in post-processing.
Exposure compensation: Be prepared to use negative exposure compensation to prevent overexposure of bright reflections.
Advanced Techniques for Reflective Product Photography
Once you've mastered the basics, consider these advanced techniques to take your reflective product photography to the next level:
Focus Stacking
For products with intricate details throughout, focus stacking can ensure sharpness from front to back:
- Take multiple shots, changing the focus point slightly each time.
- Use software like Photoshop or Helicon Focus to combine the images.
HDR (High Dynamic Range) Imaging
For products with extreme contrast, HDR can help capture details in both highlights and shadows:
- Shoot multiple exposures of the same scene.
- Combine them in post-processing to create a single image with extended dynamic range.
Light Painting
For dramatic effects on larger reflective products:
- Set up your camera for a long exposure in a dark room.
- Use a small light source to "paint" light onto specific areas of the product during the exposure.
Polarizing Filters
These can be invaluable for controlling reflections:
- Use a circular polarizing filter on your lens.
- Rotate the filter to reduce or eliminate specific reflections.
Post-Processing Tips for Reflective Product Photos
Even with the best lighting setup, some post-processing may be necessary:
Remove dust and imperfections using the healing brush or clone stamp tool in your editing software.
Adjust contrast and clarity to enhance product details. Be careful not to overdo it, as this can create an unnatural look.
Fine-tune white balance to ensure accurate color representation. This is especially important for products like jewelry or electronics where color accuracy is crucial.
Use selective adjustments to address any remaining hotspots or shadows. Tools like the adjustment brush in Lightroom or layer masks in Photoshop are invaluable for this.
Consider frequency separation for advanced retouching. This technique allows you to adjust texture and color separately, which can be particularly useful for reflective surfaces.
Create a realistic drop shadow if needed to ground the product and add dimension to the image.
Experiment with background replacement to create different moods or contexts for your product.
Troubleshooting Common Issues in Reflective Product Photography
Even with careful setup, you may encounter some challenges. Here are solutions to common problems:
Problem: Unwanted reflections of the camera or photographer
Solution: Use a longer lens and shoot from further away, or use a remote trigger and hide behind a scrim.Problem: Hotspots on curved surfaces
Solution: Increase the size of your light source or add more diffusion.Problem: Loss of detail in shadows
Solution: Add fill light using reflectors or adjust your lighting ratio.Problem: Color casts from nearby objects
Solution: Use neutral-colored tools and backdrops, and consider using a color checker in your workflow.Problem: Difficulty focusing on reflective surfaces
Solution: Use manual focus, or temporarily place a matte object on the surface to help auto-focus before removing it for the final shot.
Conclusion: Practice Makes Perfect
Mastering reflective product photography with DIY lighting setups is a skill that develops over time. Each product presents unique challenges, so don't be discouraged if your first attempts aren't perfect. Experiment with different setups, angles, and lighting positions to find what works best for each item.
Remember, the key to great reflective product photography lies in controlling and shaping light. With these DIY techniques, you can create professional-looking images that showcase your products in their best light, quite literally. As you gain experience, you'll develop an intuitive sense for how light interacts with different surfaces, allowing you to quickly set up and capture stunning product photos.
By investing time in perfecting your lighting techniques, you'll elevate your product photography, potentially increasing sales and setting your brand apart in a competitive market. The ability to create high-quality product images in-house can also lead to significant cost savings compared to hiring a professional photographer for every product.
So grab your camera, set up your DIY studio, and start experimenting – your perfect reflective product shot is just a few adjustments away! With patience, practice, and the techniques outlined in this guide, you'll soon be creating images that rival those of professional product photographers, all with equipment you can put together on a budget.